Some of you may be looking to jailbreak iOS 6.1.3 on devices that come with an A4 chip or older chips. These devices can include iPhone 3GS, 4 and iPod Touch 4G.

So we’re here today to tell you how this can be done not through Redsn0w, but sn0wbreeze 2.9.14. Jump after the break to follow our guide to jailbreak iOS 6.1.3 (Pre-A5 devices).
Compatible IOS 6.1.3 Devices that can be jailbroken
For those who don’t know, the untethered jailbreak for the iOS 6.1.2, 6.1, 6.0.1 and 6.0 firmware that was made by evasi0n was patched by Apple in the latest iOS update, but the Limera1n exploit made from geohot can still be used for the purpose.
Before proceeding, please note the method only works on the devices mentioned above. Apart from that, you need to have the USB cable for your device along with you. This method won’t work on the latest iPhone, the iPod Touch 5G or even the iPhone 4S. It’s also a tethered jailbreak, so a connection of the device will be required with the computer where you would be using iBooty to boot the device tethered every time when it restarts.
Without further taking your time, here are the IOS 6.1.3 Jailbreak instructions:
Step 1: Download iOS 6.1.3 on your device if you want to follow this guide.
Step 2: Download the latest version of sn0wbreeze.
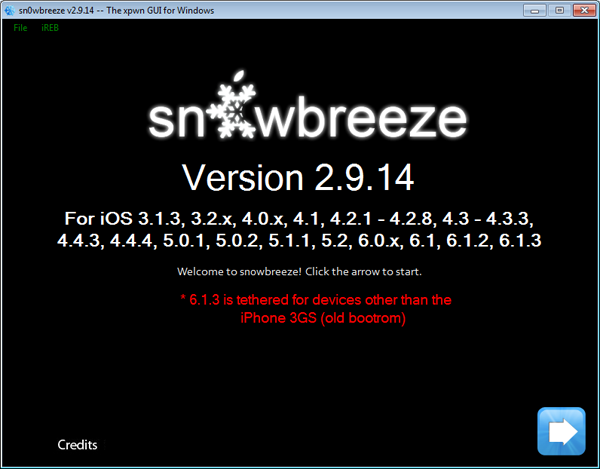
Step 3: Start the sn0wbreeze software, go to the bottom right of the interface and select the blue arrow by clicking on tip.
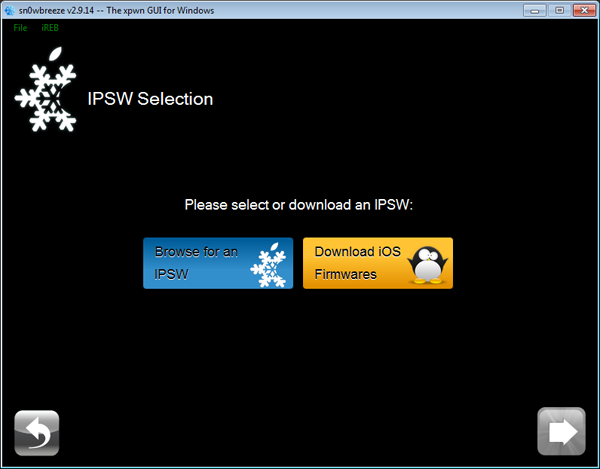
Step 4: Next, click the box that says Browser for an IPSW, and choose the firmware file downloaded in the previous step.
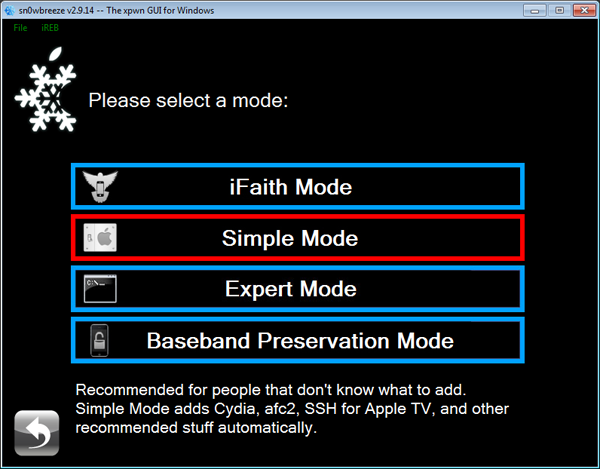
Step 5: After the firmware goes through verification, click on next arrow -> Simple Mode.
Step 6: Now you will be prompted to activate your iDevice. Go for No if you are on factory unlock or an official carrier, or go for Yes if the device needs to be unlocked through ultrasn0w 1.2.8.

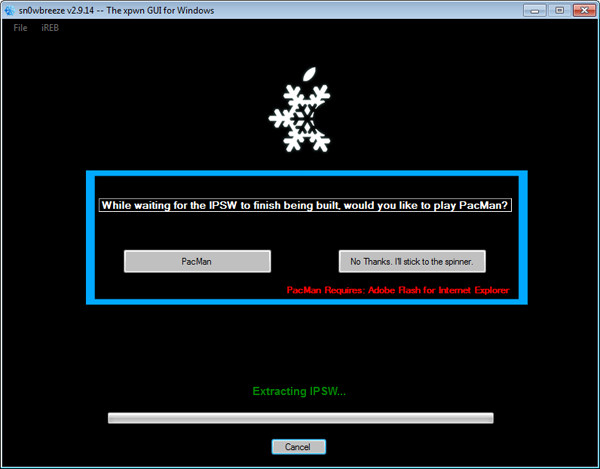
Step 7: Now sn0wbreeze will start making the file for custom firmware, which will take a while. After it’s done, the file will be placed on your desktop.
Step 8: Now you will be asked by sn0wbreeze for entering the Pwned DFU mode. How to do that? Just follow on-screen instructions. This may take few attempts, and you can keep trying till you succeed.
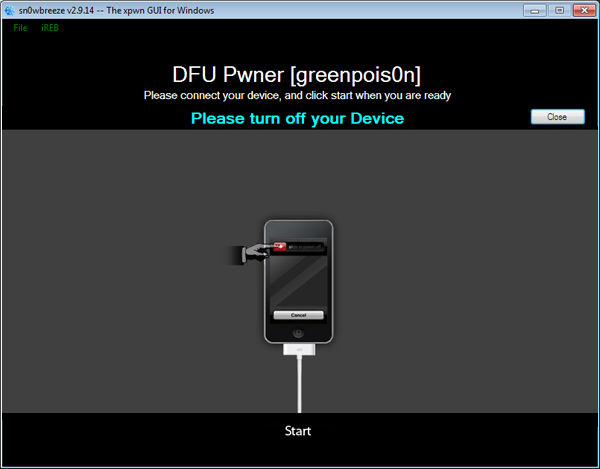
Step 9: After reaching Pwned DFU mode, open iTunes, and keep the device connected to PC.
Step 10: iTunes will make a detection, but in recovery mode. Use your keyboard to press the left SHIFT key and while holding it, click on Restore. Choose the file for custom firmware from your desktop.
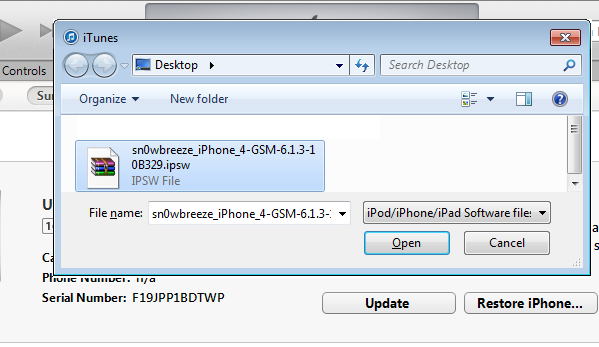
Step 11: Let the restoration process complete, and after it is, the device will start and Cydia will be there.
Steps to boot tethered your iOS 6.1.3 Device
In case you forgot, we did tell you this jailbreak was tethered. Now you need to go to the iBooty folder created on the desktop and follow these steps:
- Start iBooty tool from your desktop.
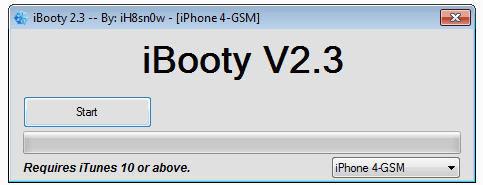
- Go to the drop-down menu and choose your device. Next, select the Start button by clicking on it and place the device in DFU-mode by following on-screen instructions.
- After the process is complete, the device will start and that’s all that was required.
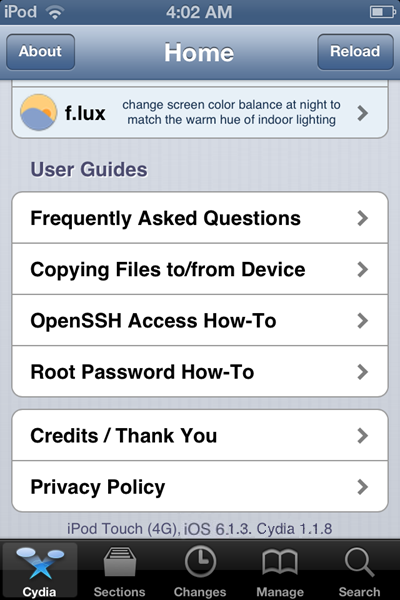
Well, that was it. Not to big of a deal once you get to it. Enjoy your newly jailbroken iDevice and feel free to leave comments. We will keep bringing new guides as soon as they appear.


![Downgrade from iOS 6.1.3 to iOS 6.1.2 iPhone 4 / 3GS [Guide] redsnw downgrade ios](https://cdn.unlockboot.com/wp-content/uploads/2013/03/redsn0w-downgrade-ios-6.1.3-324x160.png)


