Windows 10 is out and already 14 million downloads have been made. Many PCs are running it without any problems. But what if you are a Mac Use and want to try it? If you’re a Mac user wanting to experience Windows 10, then this is the post you should be reading. We show you how to install Windows 10 on Mac, MacBook Pro, MacBook Air, iMac, Mac Mini free of charge.
How to Install Windows 10 on Mac Using Boot Camp
Before you begin the Windows 10 installation process, you need to consider a few things. It is important to backup all your data, and although the process you’re going to go through is good, it’s always a good idea to create a backup.
The following are the system requirements if you want to install Windows 10 on Mac – 1 GB 32-bit or 2 GB 64-bit RAM, 1 GHz or SoC or faster processor & hard disk space of 20 GB for 64-bit OS and 16 GB for 32-bit OS.
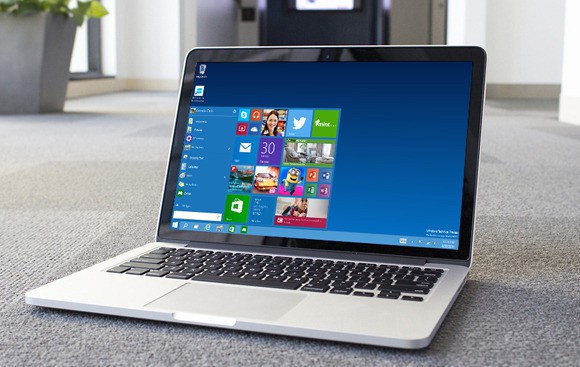
Windows 10 installed on MacBook Pro
You also need a good internet connection, an empty flash drive containing at least 16 GB space, 30 GB of free space, Windows 10 ISO file, a Mac Admin account to access Boot Camp and 40 GB for upgrading from an existing Windows version. Follow the steps below to install Windows 10 on Mac using Boot Camp.
13 Steps to Install Windows 10 on Mac Computer
Once you’ve read about everything and followed the prerequisites, you can take these steps:
Step 1: Go to Windows media creation tool.
Step 2: Select ‘Windows 10’ -> ‘Confirm’ under ‘Select Edition’.
Step 3: Choose your language and select confirm.
Step 4: Now links for downloading Windows 10 ISO for 32 bit and 64 bit will be visible. Select the one applicable for you (64-bit if the Mac is new).
Step 5: Put in your flash drive and press ‘command + space bar) to launch ‘Boot Camp Assistant’. You can also do this by searching via ‘Finder’. Then select ‘Continue’.
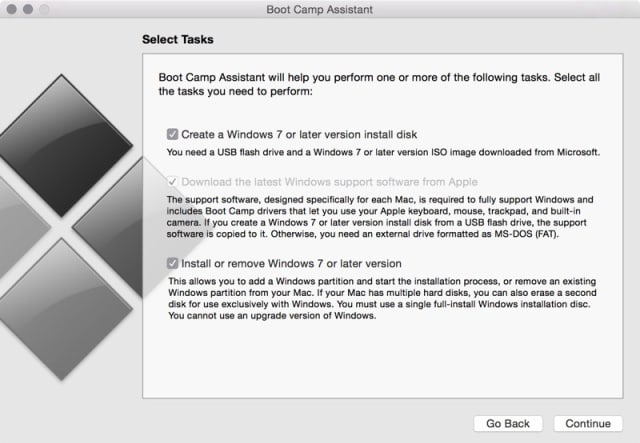
Boot Camp Windows 10 Installation Steps
Step 6: Mark tick in all boxes if this is your first installation or do a clean install. Uncheck the first box if you’re trying to upgrade from a current Windows version, before clicking continue.
Step 7: Choose the ISO file you downloaded and pick your flash drive destination, and click continue.
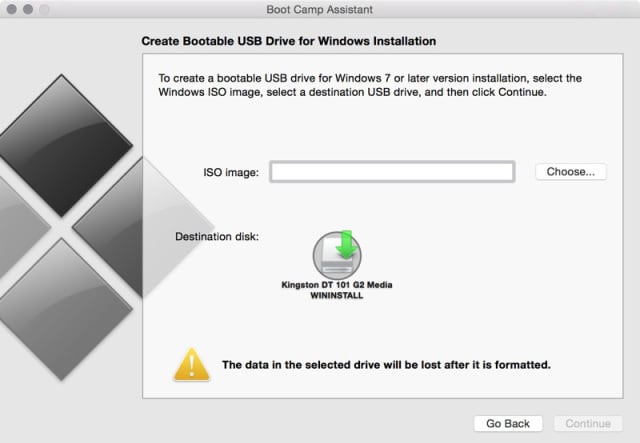
Use Boot Camp on Mac to create Bootable Windows 10 USB
Step 8: Now wait as the process completes. It takes an hour or above in some cases.
Step 9: Once the process is complete, you’ll be asked to partition. The step is important and can’t be undone. Choose the right amount, put 20-30 GB if you’re not going to be using this Windows a lot, or expand accordingly.
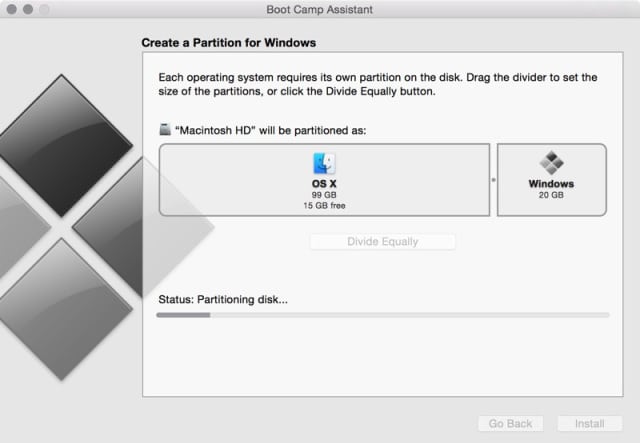
Bootcamp Windows 10 partition size 20GB
Step 10: Now select install, and wait when the Windows 10 restarts a few times.
Step 11: Now you’ll have to choose where to install this version of Windows. Choose the partition titled ‘Boot Camp’ and then follow on-screen instructions.
Step 12: Enter the product key when asked for it. This key will be in your email that Microsoft sent to you when you requested Windows 10 upgrade, or ask a friend for this key. Remember, users of Windows 8.1, Windows 8 and Windows 7 can upgrade to Windows 10 for free.
Step 13: Once everything is complete, you can switch between Mac OS X and Windows 10 by restarting the Mac. Just press ‘option (alt)’ key and you’ll be able to select between the two.
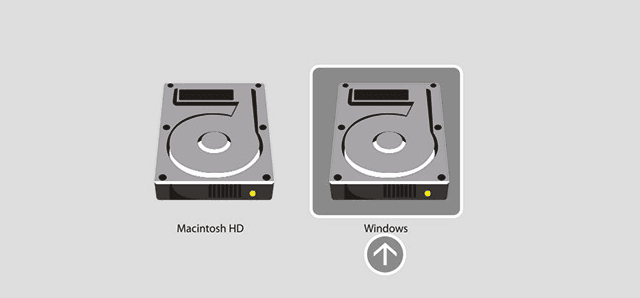
Dual boot Windows 10 on Mac – Select Windows partition
If you followed these steps correctly, Windows 10 will be there on your Mac. Any comment? Feel free to write below.
")


