DNS or the Domain Name System is the internet’s phone book. They help maintain a directory of domain names and translate them into IP address. This is necessary because, although domain names are easy for people to remember – the computers and machines use IP addresses to access websites.
Each ISP has their own Domain Name Server (DNS) which is used by default on all iOS devices but there is a way to revert it to a different DNS server.
But, why would you want to change it? Well, the reason is quite obvious. Most ISP’s DNS servers aren’t that fast which impacts the user’s browsing experience. ISP’s often redirecting users to unwanted sites for marketing which can be a nuisance for many internet users.
If you have also face the above mentioned issues or experienced a situation where your required website opens up on other connections – then changing the DNS is the best option to fix the issue.
Steps to Change DNS on iPhone or iPad
Follow the step-by-step procedure to easily change the DNS setting on your iPad and iPhone.
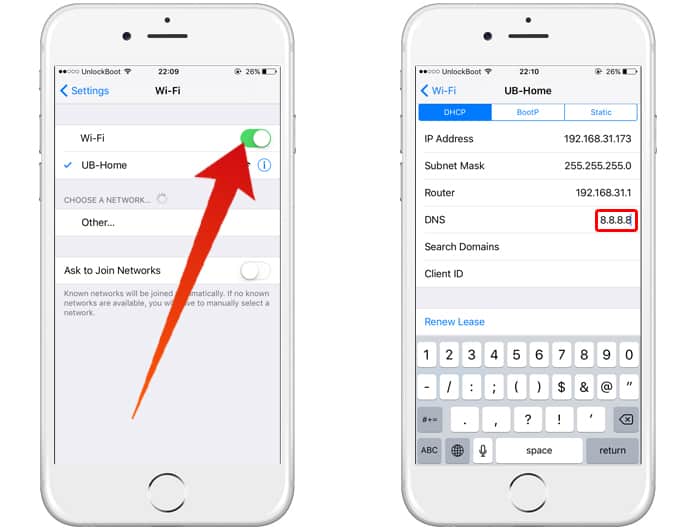
- Open the Settings app and tap on ‘Wi-Fi’ menu.
- Search for your Wi-Fi connection from the list and tap the (i) located on the right.
- Scroll down until you see the DNS tab and click on the numbers to the right.
- A keyboard will appear automatically where you can enter the new DNS server address.
- Tap on the Wi-Fi to go back to the previous menu.
Which DNS Server is Best for Use?
Of course, you can’t complete the above steps without knowing which DNS server to use. Here are some servers you can try to enhance your internet experience with iPad and iPhone.
Google DNS – Google has a free DNS service that is known for fast speed, reliable performance and of course – security. To use the Google’s DNS server, simply type one of the following code in the DNS field.
- 8.8.8.8
- 8.8.4.4
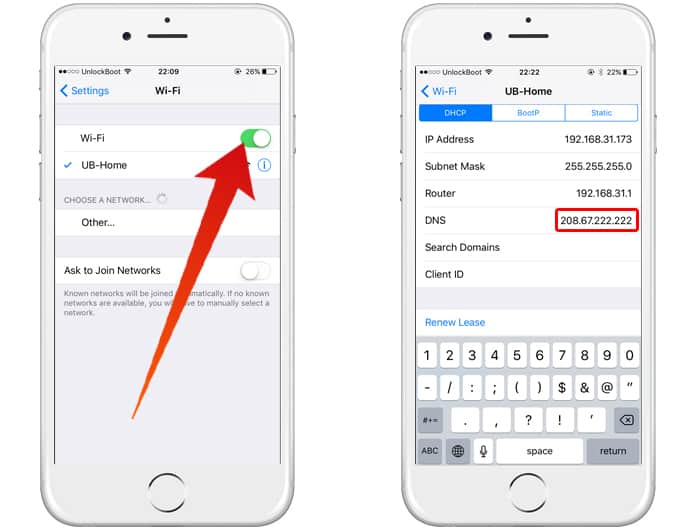
OpenDNS – Another free DNS service that also promises the users good speed, reliable performance, and enhanced security. Type either of the addresses in the option for DNS.
- 208.67.222.222
- 208.67.222.220
Read Also: How to Unblock Apps at School on iPhone
Did these help?
Of course, there are many other DNS servers available which you can use to improve your browsing experience. Do let us know which one you use and if you saw any improvements with the above mentioned techniques?


