There are many famous rivalries that can be found all over the world. In sports alone, we have Real Madrid against Barca, Pakistan versus India and of course, there is the rivalry between England and Australia in the Ashes. Similarly, the technology world also has rivalries of its own. Samsung against Apple is a relevant example. However, most people don’t focus on these rivalries too much and just use whichever form of tech is most easy for them. One such rivalry is the one that exists between various formatting types in different computer Operating Systems (OS). Today, we are going to teach you how to format USB drive on mac in every possible format type.
Most users go by without noticing these small details; that is until the actually need to copy files into a storage that is formatted for a different OS type. Mac OS users are the ones who are most likely to run into this problem, so if you are a Mac user this article is definitely a must-read. Unless you know of the different file format systems and know which format to choose for your USB drive to be sure of compatibility with other systems you will get nowhere.
Choosing a File Format System in Mac
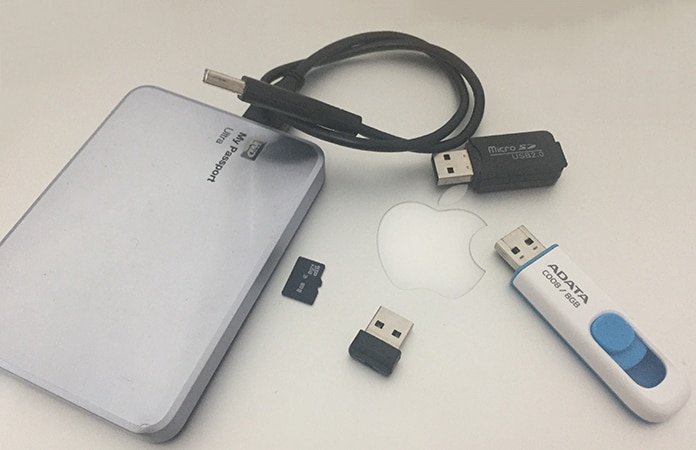
The increased use of the USB drive means that it is probably the most popular of storing data and media. Many users share and distribute files through a USB drive. However, this highlights the need for file system compatibility since so many people are using it. Since there are so many different formats available it becomes important to choose one specific format depending upon its merits, demerits as well as what your usage is. Have a look at our list of the most commonly used file format systems:
1. FAT32 Format
This is the next generation of FAT that has a legacy from back in the DOS era. Pretty much any USB will be pre-formatted with FAT 32 file system since it is so easy to use everywhere. The only problem of this file system is that it cannot support files that are bigger than 4GB and partitions cannot be created for storages larger than 2TB. If you are using simple files with small sizes and have a total storage that is less than 2TB then this is a great file system to use.
2. ExFAT Format
This system offers universal support but with the added advantage that it allows exchange of files larger than 4GB. It works on Windows, Linux (with FUSE) and Mac OS. It is very frequently used in cases of shared hard drives that are plugged into the PC. However, the issue is that it isn’t as compatible as the FAT32 and there are certain devices that won’t be able to support it, such as the PS3 and X-Box 360 gaming consoles.
3. NTFS Format
NTFS is great for people who work exclusively on Windows systems since this format is the new generation of file formatting on this OS. It supports really large files and can read and write much faster than the FAT32 if all other factors are constant. The drawback is that its compatibility is even less than the ExFAT. The Mac OS and a few Linux distributions can read NTFS formats without using any third party software. However, the NTFS is still best suited for internal drives on Windows computers.
4. Mac OS Extended Format
On the other hand from NTFS, is the Mac OS Extended File System or known as the HFS Plus. This is basically the NTFS counterpart that works only for the Mac OS environment. It offers support for volume size and file size up to 8EB (Exabytes). Saying that is massively huge is an understatement; that amount of memory equates to 8 million Terabytes. That is just a theoretical limit because nothing ever heard of till now will actually be able to breach that threshold.
2 Methods to Format USB Drive on Mac
External drives are factory pre-formatted but despite this, there are times when you will have to re-format the drive. For instance in case you need to change the file format of a drive, just create a bootable installer or clean a USB of viruses you should know how to format. There are actually different methods to format USB drive on Mac OS. Here they are:
1. Use Disk Utility to Format USB Flash Drive on Mac
The simplest way to format a disk in Mac OS is to simply use the Disk Utility since it is the Mac’s built in disk maintenance tool. To format USB drive on Mac using this method, all you need to do is plug in the USB device into your Mac and select it from the Disk Utility’s sidebar menu.
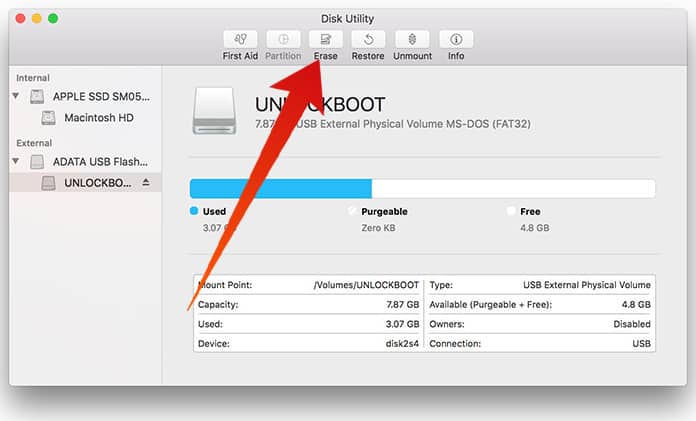
Next, just select the Erase button from the top bar which will cause a menu to appear with numerous customization options. First of all, it will ask which your preferred format system is. The Disk Utility will choose Mac OS Extended (Journaled) by default; this is on its own a great choice for use in the Mac OS environment.
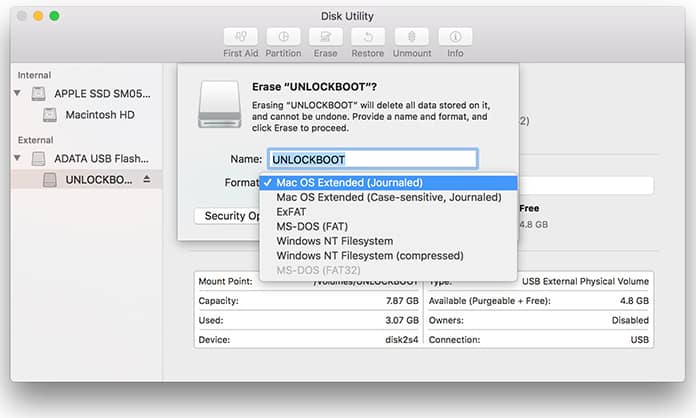
The ‘Case Sensitive’ variant just means that later the files in that drive will be case sensitive. There will be a difference in ‘Name.jpg’ and ‘name.jpg’. Keep in mind that this method could work for some users and it may not for others.
‘Encrypted’ means what its name implies. The data inside the drive will be secured through encryption which will be very useful for those users who are working with sensitive information and need to maintain security.
Then, there is the option of using FAT32 or ExFAT in case you have to share files and data with other OS. Sadly, there is no way to format a drive in NTFS since Mac OS doesn’t support that format system.
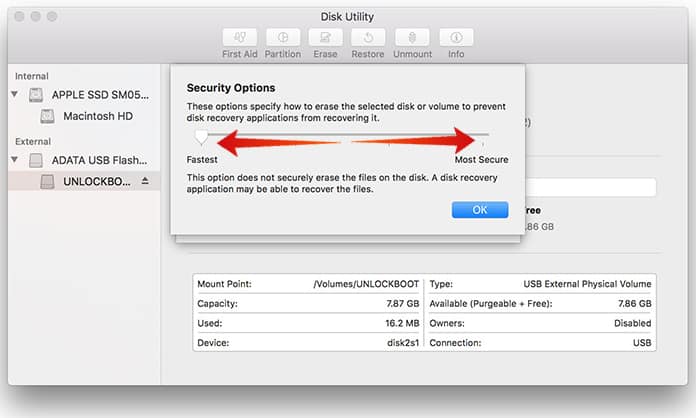
Lastly, we have the option for Security. This can be used to prevent disk recovery applications from restoring any data from the disk and it also takes the security slider from ‘Fastest’ to ‘Most Secure’. Keep in mind that the further along the slider is towards more security the longer this whole process will take.
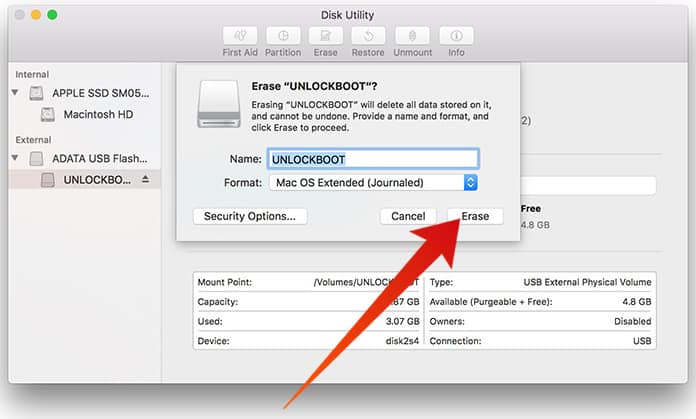
Once you have set these options and optimized them to your liking, just click the ‘Erase’ button to begin the formatting process.
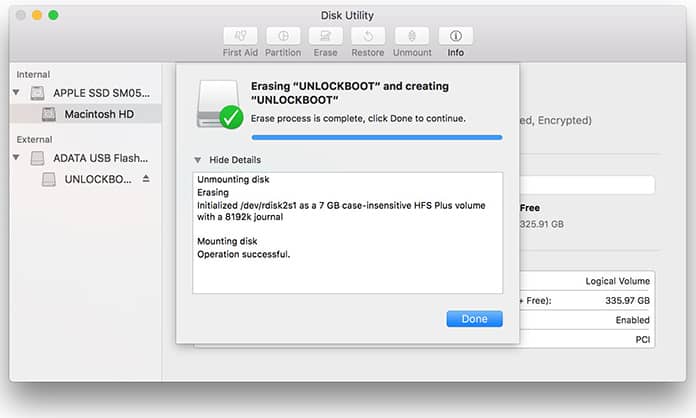
After that, the USB drive will be formatted and you can start using it.
2. Use Terminal to Format USB Drive on Mac
The computer geeks can use the Terminal for disk formatting through the use of command lines. Just bear in mind that formatting a disk in this manner can be risky, since a single typo or one line here or there could mean that you lose data you wouldn’t want to otherwise. There is no warning and no prompt and no way to go back on your decision so this method is recommended for those who are experienced in use of Terminal and command lines in general.
If you are confident enough, just launch Terminal and write down or copy paste this:
diskutil list
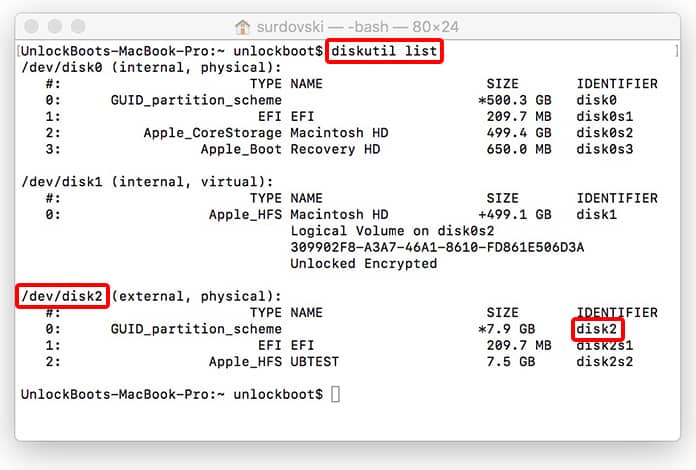
Next, you should see what your external disk is identified as, it can be something like ‘disk3’. After that, just choose this disk to be erased by using this command line:
diskutil erasedisk {filesystem} {name to use} /dev/{disk identifier}
In the {filesystem} place just enter your desired formatting system. Next, the {name to use} should be the name that you want to use for your disk and lastly {disk identifier} is the disk that you would like to erase. To further clarify this, just imagine that if you wish to format the USB disk in Journaled HFS Plus with the name UBTEST you have to do the following:
Place ‘JHFS+’ in the {filesystem}, ‘UBTEST’ in {name to use} and ‘disk3’ in {disk identifier}. The final command line should look something like this:
diskutil eraseDisk JHFS+ UBTEST /dev/disk2
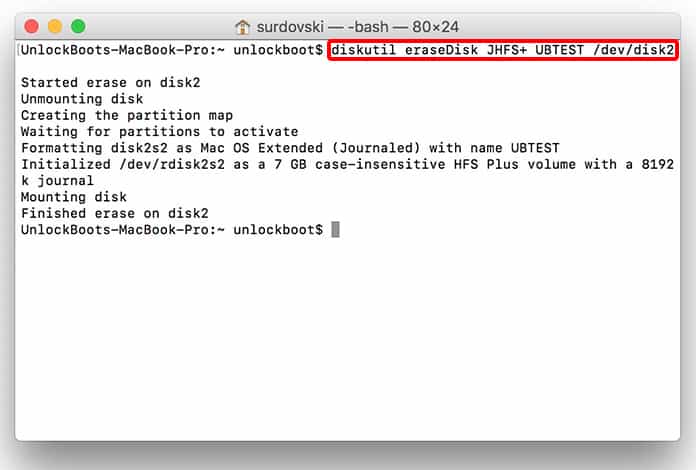
Be careful that you use the identification that you get from Terminal for the first step. Using the wrong name here can cause data loss from a part of your computer that you do not want, so be very wary!
Fix Formatting Issues on Mac
Since there is a difference in handling the file formatting system amongst various OS there could be certain issues that arise. There were users that said their USB drives, formatted using Disk Utility, weren’t recognized by Windows. This problem can be fixed by enabling Disk Utility’s MBR (Master Boot Record) by closing Disk Utility and typing this command in the Terminal:
defaults write com.apple.diskutlityadvanced-image-options 1
Just relaunch Disk Utility to format USB drive on Mac using the ExFat system.
Reading and Writing to Windows NTFS Formatted Disk
Mac users can easily choose the file system for compatibility with other OS, most Windows users are not even aware of various formatting systems. So, it’s possible you might stumble across the NTFS formatted external drive.
Mac OS can read NTFS formatted drives so files can be read and copied. The problem comes when writing; the easy way to solve this problem is to use third party software. The best alternatives are Paragon NTFS for Mac and Tuxera NTFS app for Mac.
If you have any useful tips or helpful information in this regard please don’t hesitate and let us know in the comments.
")


