Like Windows based computers, even Macintosh systems hold a lot of hidden files in their system. They are either hidden by the user of the Macintosh, or probably some system files that are kept hidden from the user for security and stability reason. Few example of hidden files on a Mac are – .bash profile, .svn directory etc. Pretty much any file or folder that starts with a prefix ‘.’ sign are hidden in Mac ecosystem. However, in order to make these hidden files visible a specific command in the terminal would be enough.
In this article, we are going to explain how to unhide files in Mac OS X through the terminal window using a line of code. Since all files in Mac OS X are marked with hidden status using a full stop, they are easy to locate if the user is savvy enough. For a try out, user might hide a file in Mac OS X by themselves by renaming a file in the mentioned way.
How to Modify Mac OS X Settings to Show Hidden Files
The default settings of Finder in Mac OS X is set to ignore the hidden files while the file system is being explored. However, by making necessary changes to the Mac system, Finder could be altered with a new settings so that it discovers even the hidden files on Mac OS X. To change the Finder settings, use Terminal window.
Show hidden files on Mac OS
Terminal is located at Applications -> Utilities. A computer user with experience in Unix operating system would be able to figure out the entire procedure in a blink, however the newbies might have some trouble. Follow along this tutorial to and you’ll be able to make sense of this tutorial.
However, once you launch Terminal, use the following command line to unhide the files in a Mac OS X System. However, the following piece of code is applicable only for the Mac OS X Mavericks 10.9, Yosemite 10.10 and El Capitan 10.11 versions.
defaults write com.apple.finder AppleShowAllFiles TRUE;killall Finder
If your Mac is older and has any of the following OS – Mac OS X 10.6 Snow Leopard, 10.7 Lion and 10.8 Mountain Lion, then the code would be slightly different.
defaults write com.apple.Finder AppleShowAllFiles TRUE
And then, this: killall Finder
As you can see, only the tailing part of the code changes, the killall Finder part now needs to be entered in a 2nd step. If you can’t make sense of these terminal codes, simply copy-paste these on the Terminal window.
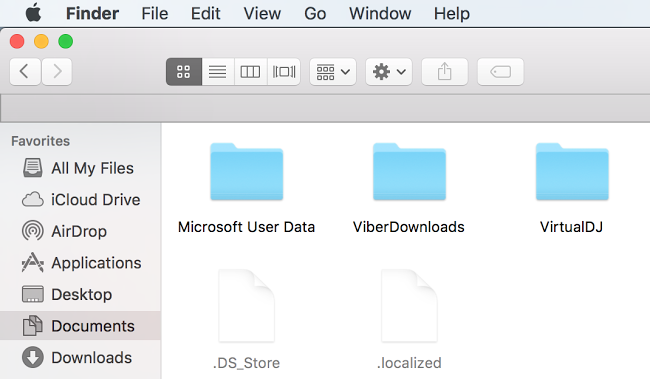
However, to see the unhidden files on Mac OS X, Finder needs to be re-launched. After re-launching Finder, the hidden files’ name will appear in grey text.
Revert back to Hidden Status

Show or Hide hidden files on Mac
In order to hide the files you have just unhidden on a Mac OS X platform, use the above mentioned commands with FALSE instead of TRUE; which should look like this –
defaults write com.apple.Finder AppleShowAllFiles FALSE
And the files should disappear again from Finder window after a re-launch.
Conclusion: We have to admit the file hiding and un-hiding process isn’t as efficient and easy as it is on Windows, but once you get a hold of Terminal coding the whole process becomes a lot easier.
")


