App Signer is an app that is used to combine different IPA files to get a combined file. This app is very beneficial when you are going to install multiple apps on your device. It will help you to install all the combined apps quickly. The primary purpose of using App Signer is ease of installing the apps. In this article, we will show you how to download iOS app signer for Mac and Windows 10, 8 or 7.
Download iOS App Signer to Sign IPA Apps on Mac or Windows
We know if we are trying to install an app from a third party source, we will need some tools to do this. This could include a USB cable, iTunes, a Mac and a sideloading app like Cydia Impactor. Although the process of installing any app on your device is simple, yet you will get the easier way to install apps on your device by using iOS App Signer. When we combine different IPAs in App Signer, it combines them all to form a new and we can install every app on our device in just a single click.
App Signer requires Mac OS X 10.9 or later running on your Mac. You will also have to install Xcode 7 or later on your system in order to install the app on your Mac. Moreover, a USB cable is required to connect your device with Mac.
Steps to Download iOS App Signer for Mac or Windows
The process is very simple, and you can easily perform it yourself. Just follow the directions to finish the method.
Step 1: First of all, download the iOS App Signer app from the internet. You can easily find the app for your Mac on the internet.
Step 2: Now launch Xcode on your system including Mac or Windows. Now create a new iOS application. This application will be used to install the app on your system. You can choose the app type according to your system.
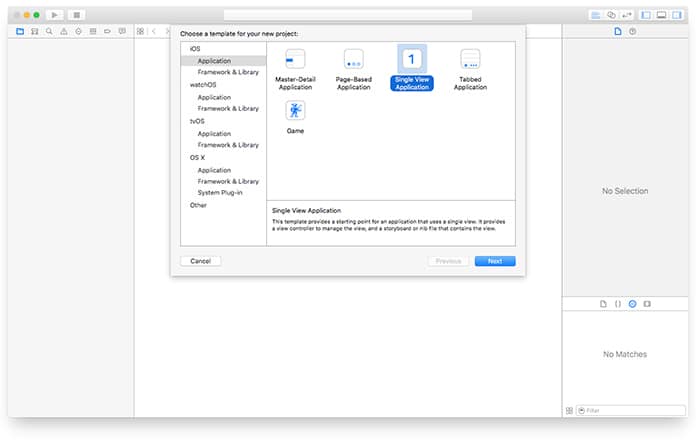
Create new Xcode project to sign iOS app
Step 3: While creating the new iOS application, you can give it a name to find it in your system. You can name it everything. You can also choose the identifier to find it in the future easily.
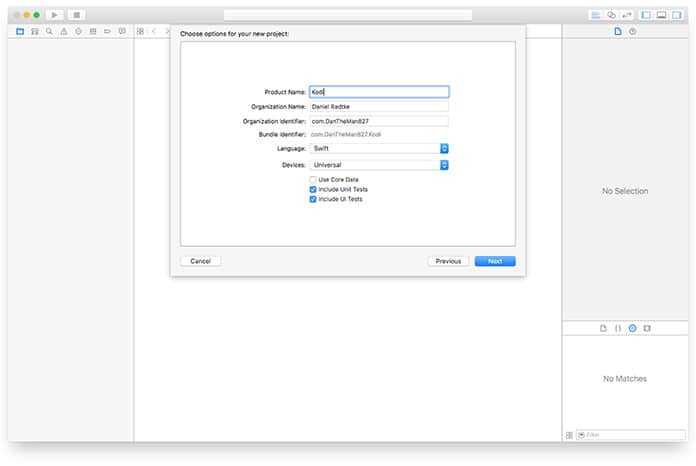
New project options to create or sign iOS app
Step 4: Sometimes, it causes some problems while signing in. It causes some problems due to the Apple ID. Sometimes we use different IDs with the same device, and it generates some problems. However, if you see your Apple ID there, you can click on it to select it. On the other hand, if you don’t see your Apple ID, you will have to put it in the bar.
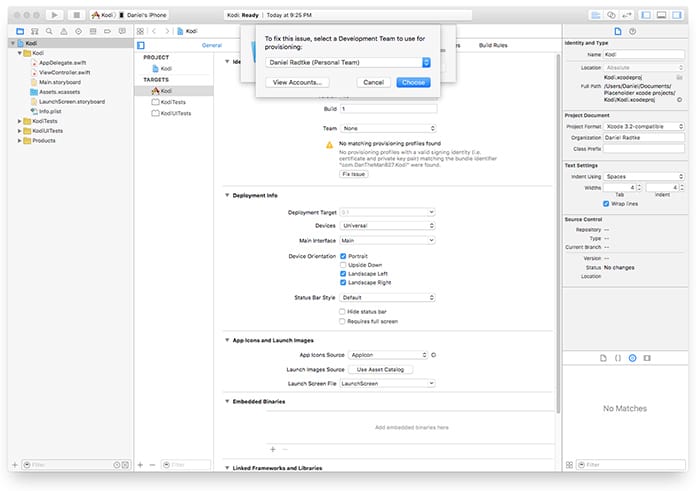
Select account to sign iOS app on your Mac
Step 5: To get rid of further errors, you can select your device from the connected devices. You will have to select your device in the Xcode screen.
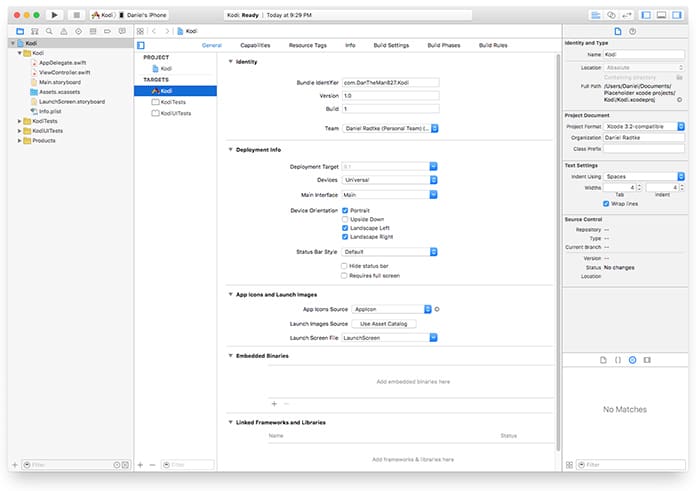
Select your device to Sign IPA app
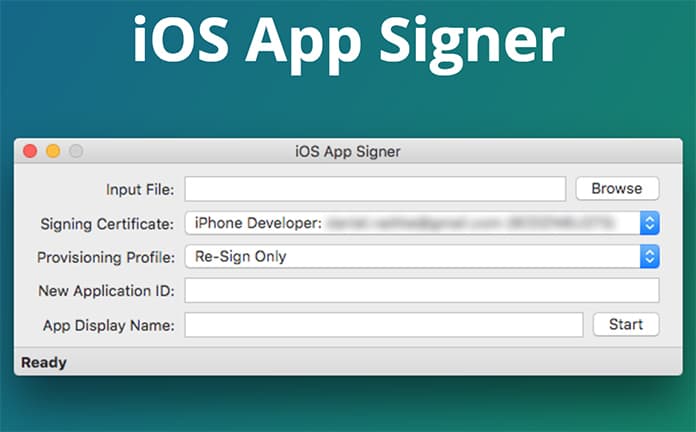
Step 6: Open the iOS Signer App and select signing certificate. Now select your profile and click on Start.
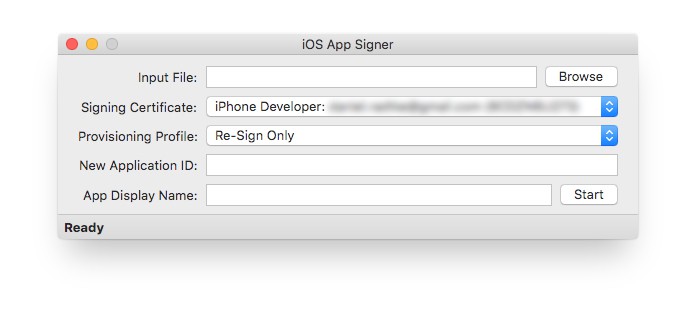
Use iOS App Signer to Sign apps
Step 7: It will generate a file, and you can save it on your device. Now you can use this generated file to install the apps on your iPhone easily.
The above instructions are enough. The process is completed and you can easily generate any type of IPA files. Make sure you have the latest version of Xcode and Mac OS X installed on your Mac Computer.


