The latest iOS 11 update provided numerous quality of life changes for everyone. Another one of these was Persistent Notifications. When you received notifications in the past, what would happen was that the preview would be displayed for a short time before disappearing. Now, with Persistent Notifications the preview stays permanently until you swipe it away. Read on to learn how to enable Persistent Notifications on iPhone in iOS 11.
This is a great change because often we are too busy or otherwise preoccupied to check the phone immediately. Hence, it is quite an attractive feature to have enabled and here we show you how to do so. This should work on iPhones upward from the iPhone 6S all the way to the iPhone X.
How to Enable and Use Persistent Notifications in iOS 11
Persistent Notifications is one of two types of notifications that can be enabled on your iOS. It isn’t enabled by default but can be activated from the settings. However, the problem is that it can’t be activated for all apps at once; you will need to do so individually or activate it for all apps you feel are necessary manually. The steps to doing so are simple:
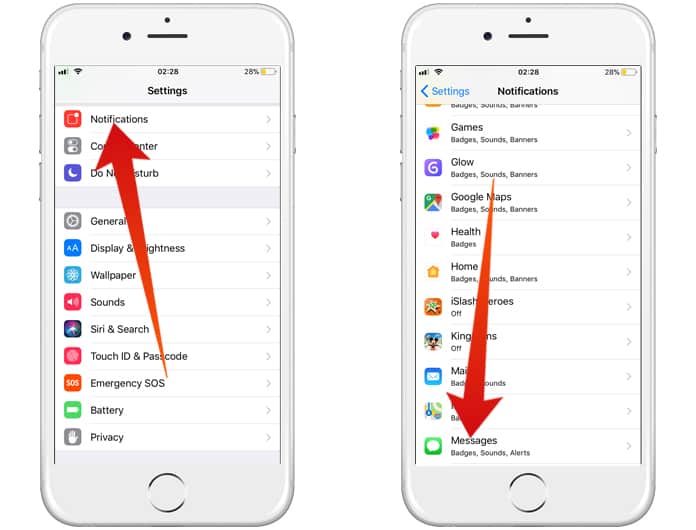
Step 1: Launch ‘Settings’ and go to Notifications.
Step 2: In the menu, scroll down till you reach the app that you wish to turn Persistent Notifications on for.
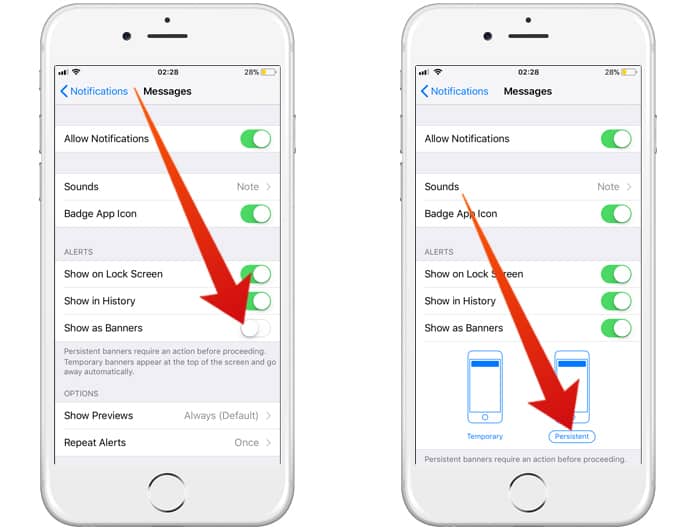
Step 3: You will reach the app’s notification settings menu and will be able to customize notifications and previews for that app.
Step 4: Right at the bottom there will be two large phone icons; tap on the one which says ‘Persistent’ and you are good to go.
Now, every time there is a notification for this app, the preview will stay permanently until you swipe it away or open it. This is a great way to stay updated and a must for messaging apps like Facebook or WhatsApp.
Read Next: How to Make iPhone Speak the Caller Name
Have you already activated persistent notifications in iOS 11? What method out of the above mentioned did you use? Feel free to leave comments.


