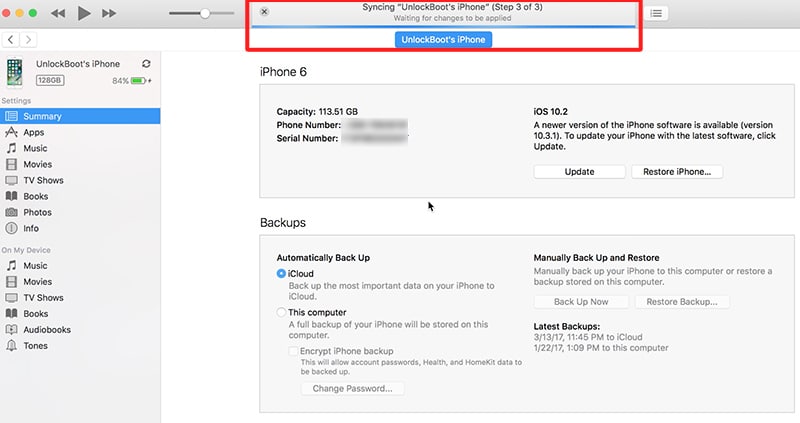
So, you were trying to sync your iPhone or iPad with iTunes, and you get this message displayed on the screen – ‘waiting for the changes to the applied’. You wait for several minutes but nothing happens, your device is stuck with that message! This can be a really frustrating experience! There are several reasons why you might be getting this message displayed on your device, and in this article we will share with you a few quick fixes for the problem.
What are the reasons behind this problem?
You may get this kind of message in three different scenarios that are as follows:
- You download music from iTunes on your device, and the process is not completed.
- On your iDevice, you go to iCloud settings and turn on the ‘Find My iPhone’ option.
- It could be that you iPhone has a corrupted voice memo that results in duplication of every sync.
Below you will find a few ways to fix the problem, however we would strongly recommend that you take a backup of the Voice Memos before trying out the steps below:
Steps to be followed on iPhone, iPad or iPod:
- First you need to disable ‘Find My iPhone’ option from the iCloud settings of your device
- Next go to iTunes app and delete each and every download in progress.
- Then launch the Voice memo app and see if the recordings list has been duplicated. You may also want to check the voice memo playlist in the iTunes library.
- Go ahead and remove all the voice memo duplicates. If you are unable to delete a few memos because they have been grayed out, reboot your device.
Steps to Fix ‘Waiting for changes to be applied’ iTunes error:
- Go to iTunes and then make a change in the devices preferences. Select ‘Prevent iPods, iPhones, iPads from syncing automatically’.
- In the iPhone summary tab, you may select ‘Manually manage music and videos’.
- When you are in iTunes, you will be able to view the list of music labeled as “manually added music”. If you see any recordings there, just select that item and delete it manually.
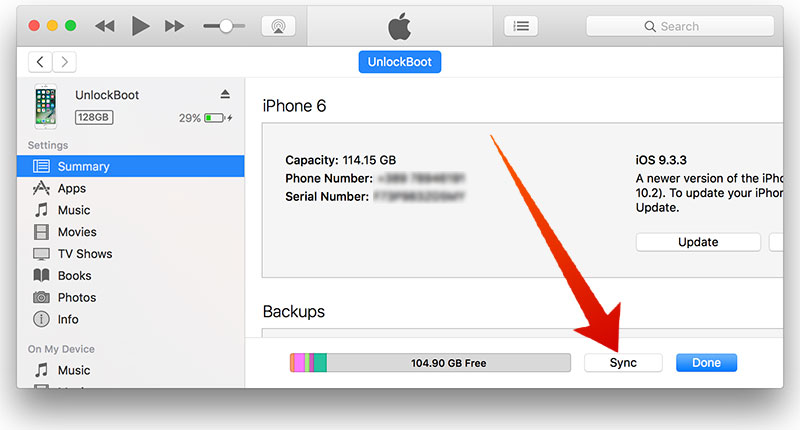
- Go to the top and un-check the “Sync Music” tab and click on “Apply”. This activity will delete all the music files from your iOS device.
- After the iTunes sync completes successfully, make sure you take a local backup of iPhone or iPad.
- When you re-enable the ‘Sync Music’ tab, make sure you uncheck the ‘Voice Memos’ and then select ‘Apply’. If this process does not complete properly then it means that you have a corrupted memo.
- After the device sync is completed successfully, you need to follow this step:
- Go to iTunes, then select Devices preference and uncheck ‘Prevent iPods, iPhones, iPads from syncing automatically’.
Before you make any changes to your iOS devices or iTunes, ensure that you have a backup of Voice Memos. It always pays to be careful when making any changes. If the above solutions do not work, restore your iPhone/ iPad.


