With the release of new iOS 11, Apple has launched some amazing features in it that are never seen before. Whether we talk about ARKit or we consider the new iOS functioning, we will always find iOS 11 the most advanced operating system. Just like these new features, Apple has launched Apple Music Profiles in the new iOS 11. With this unique feature, you will be able to share your music and playlists with your friends. If you are wondering how to create Apple Music profile on iPhone and iPad continue reading this post.

How to Create Apple Music Profile from iPhone, iPad or iPod Touch
We know that almost everyone loves music and it’s a necessary part of one’s mobile phone. We also know that on our iPhone, we can easily listen to our favorite music after buying and downloading them to out iPhone. Millions of songs are available on Apple Music on iTunes that you can listen to anywhere anytime. Besides listening to your preferred music on your iPhone, you can now share your playlists and music with your friends.
On the other hand, you will be able to find out and listen to your friends’ music. It’s an entertaining idea, and people liked it very much. If you are a true music lover and want to discover more new song every day, this feature is best for you. Today, we will explain to you how to create Apple Music profile and share your music with your friends. Have a look at the methods to do this job below.
Steps to Create Apple Music Profile on iPhone and iPad
Below is the complete step by step procedure of how you can make your own Apple Music Profile. It will help you to explore new music every time.
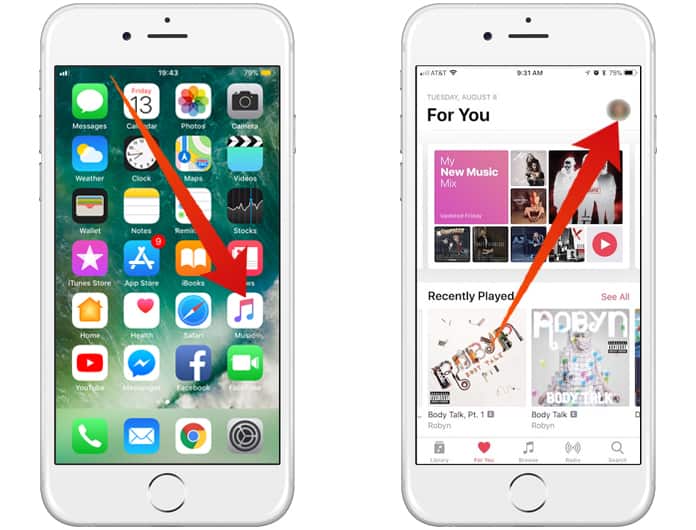
Step 1: Initial to all, open Apple Music app on your iPhone or iPad.
Step 2: On the head right corner, you will see your profile photo. Click on it.
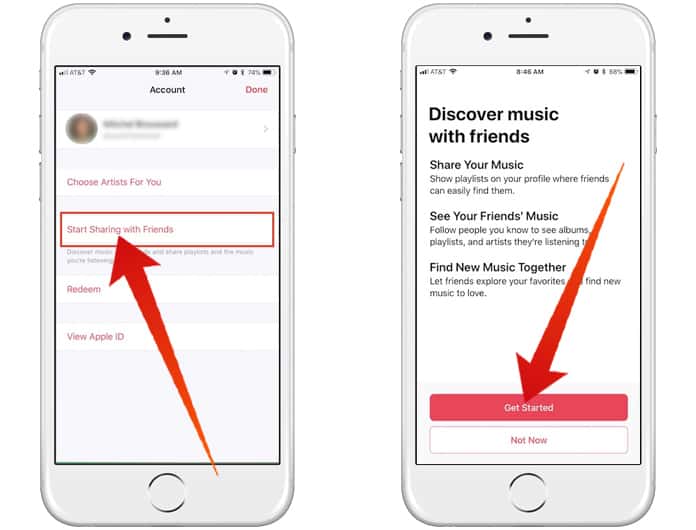
Step 3: Here you will see different options. Find and click on Start Sharing with Friends.
Step 4: Now click on Get Started and add a profile photo for your Apple Music profile.
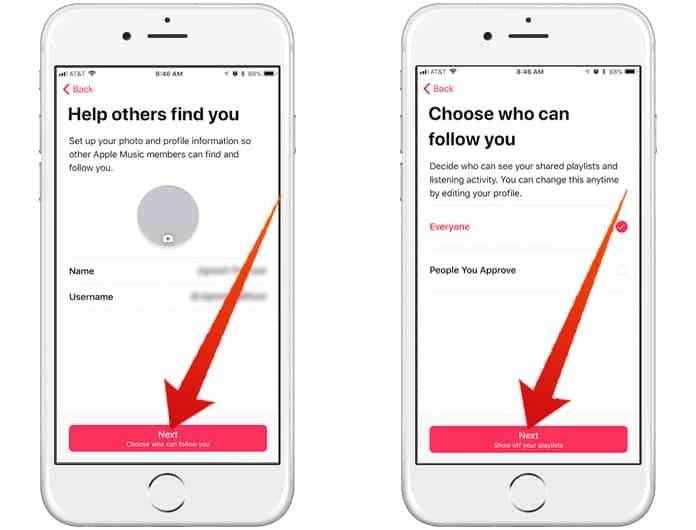
Step 5: Now enter your name and username so that Apple and people would be able to find you on Apple Music community.
Step 6: Here click on Next and set a privacy option. It includes who will see your listening history. You can set it to ‘Everyone’ or specific People You Choose.
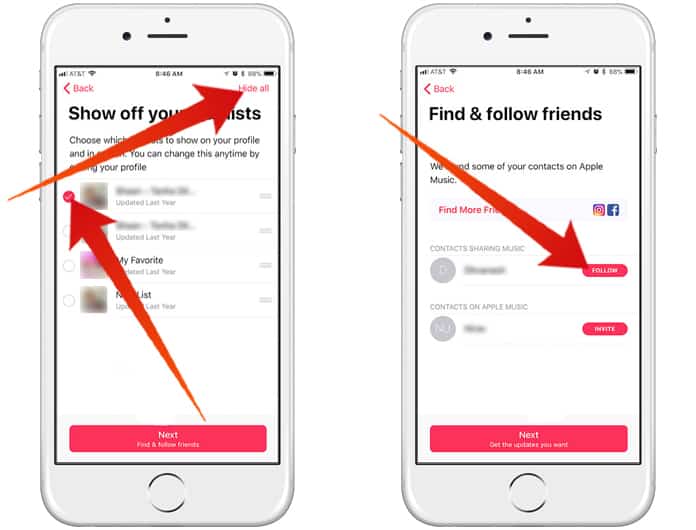
Step 7: Now if you want to share your playlists with your friends, you can select them to share. Oppositely, click on Hide all button on the top right corner.
Step 8: After selecting the playlists, select the contacts to which you want to share your playlists and music.
Step 9: When you are all done, click on ‘Done’ button to save changes.
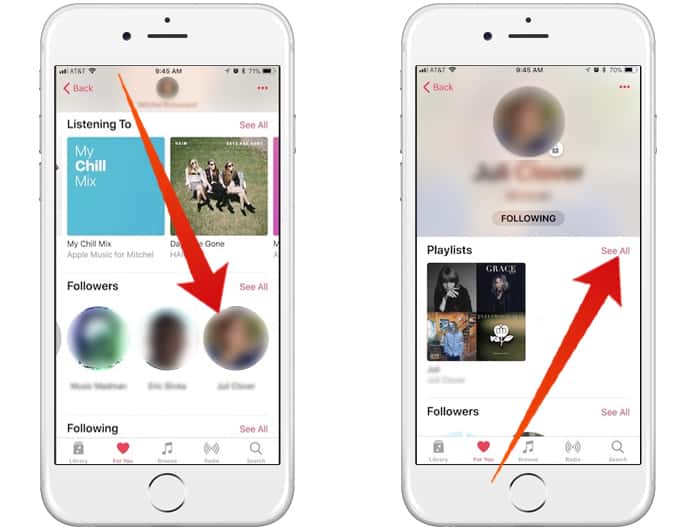
Now on the other hand, if you want to see the playlists and music history shared by your friends, you will have to find them in their profiles. Here is how you can do this job.
- Launch the Apple Music app and click on your profile photo in the top right corner.
- Under the Following tab, click on your friend’s profile.
- Here you will see the list of music shared by that friend. Click on See All to view all of his music.
Thus, you can quickly make your Apple Music Profile by following the method mentioned above. You can also add or remove playlists and history from your account.


