Apple’s AirPrinting technology is an Apple brand name for wireless printing, through their Bonjour connectivity setup. Using AirPrint technology an Apple user can effectively print any text or document file, photo and other printable contents without using any wires. The file only needs to be transferred to the printer wirelessly, preferably through a wireless access point and the AirPrint enabled printer does the rest of the job. Follow our instructions below to download and install AirPrint for Windows 10, 8 or 7 PC.

AirPrint enabled printers are now common in the printer market, they might be costlier than the average product pricing though. However, if you don’t want to invest on an AirPrint enabled printer yet, but own a Windows based PC and a great printer – all you need is to do some installation on your Windows 10, 8 or 7 computer so that it can redirect AirPrint requests to the printer.
Why would you need AirPrint service on Windows 10?
One common question the above title might arise, why bother installing so many printer services on a Windows 10 machine if you can buy an AirPrint enabled printer for quite a reasonable price? Well, on small and home offices with lots of traditional computer and printer setup it isn’t really easy to replace all or most of them with a new printer as it wouldn’t be very economic. Or maybe if you are an enthusiast who has a bare bone printer in your home you would like to use as an AirPrinter, then installing this service would be very useful.
The AirPrint for Windows PC installation is divided into few different steps, illustrated underneath.

Steps to Download and Install AirPrint for Windows 10, 8 or 7
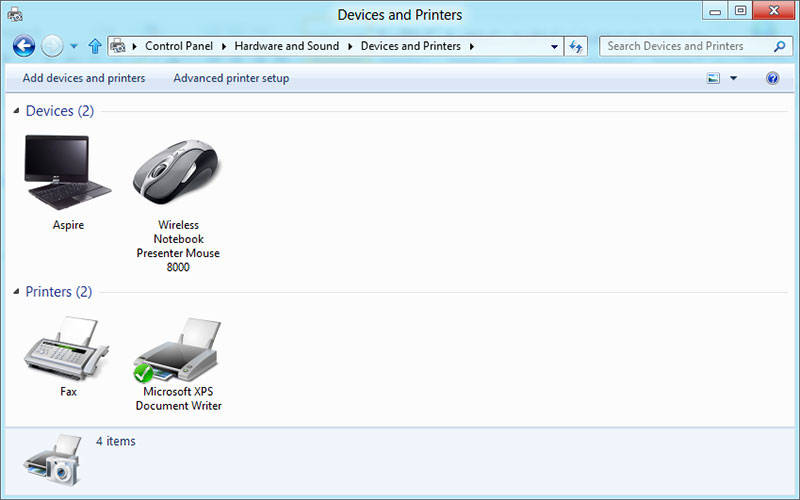
- Printer Sharing Feature on Windows: Before using a printer on a Windows 10 system as an Apple AirPrint enabled printer, the printer needs to be shared across connected networks. The settings are located inside Control Panel. Using the Start menu or Search option, navigate to Control Panel and find Devices and Printer. Double click to enter, then find the installed printer and right click on it, then select Properties. Once the Properties box opens, check the box ‘Share this printer’. Now your printer could be accessed and shared by other network users.
- Bonjour Print Service Installation: Apple website has the Bonjour Print Service installer files, however a full installation of iTunes might install Bonjour Printer Service. You should install the latest version of Bonjour Print Service for optimum output through your regular printer installed on a Windows 10 machine.
- Third Party AirPrint Components: Among lot of third party programs available for the purpose, we would choose Elpamsoft AirPrint Installer. Download the executable file, launch and click on ‘Install AirPrint Service’. If you have opened the executable files of Elpamsoft installer with Administrative Rights, the installation should enable all required components for Apple AirPrint. Once the Service Startup becomes active, click on Auto from the dropdown options box.
Now the installation is done properly, you should have AirPrint components installed on your Windows 10/8/7 computer.
Conclusion: Installing AirPrint for Windows 10 enables a computer user to utilize available resources for Apple AirPrint. However, if it’s no big deal to afford an actual AirPrint enabled printer then avail that by any means.


![30 Best Cydia Repo Sources For iOS 16/15/14 Jailbreak [2024] best cydia sources 2020](https://cdn.unlockboot.com/wp-content/uploads/2020/06/cydia-sources-13-100x70.jpg)