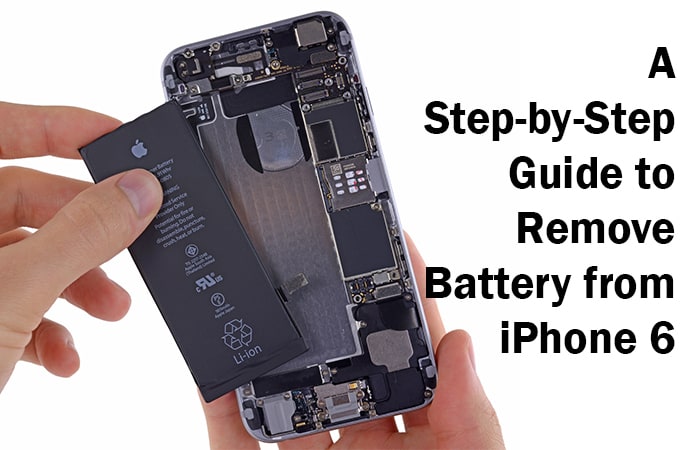
Steve Jobs envisioned and created the iPhone with the sole intention that the software, as well as the hardware, should not be tampered. So that there is always security of technology and protection from hackers. In this article, we will provide you with the step-by-step tutorial that will help you remove battery from iPhone 6 and 6 Plus. You will require a couple of unique tools to remove battery from iPhone but we will tell you about those too.
We would highly recommend contacting Apple Support first when facing such an issue or encountering a scenario if your warranty hasn’t expired. But if it has, having to fix it, you would be the more likely option. This is because Apple replaces the battery free of charge if it discovers a fault within the warranty period. The procedure is a bit complicated and varies from version to model but if you’re good with your hands, you can easily manage to remove battery from iPhone with minimal difficulty.
Why Replacing an iPhone Battery worth It?
If we ever go through the manual that comes in the box holding our brand new phones, we will see that there is a whole section dedicated to that battery. After sifting through the technicalities, to many seems like gibberish. We’ll see that replacing your original battery with a higher one or one of a different model may cause major problems for your phone and nobody wants to risk that.
However, it’s not completely a bad idea because obviously. If your battery is dying or dead, what else are we supposed to do? But to have it removed and replaced. However, it would not make sense to remove battery from iPhone. If the warranty has reached its expiry date but in the case that it hasn’t, readily have it replaced.
Read Also: How to Check iPhone Battery Cycle Count
NOTE: I mentioned it before that the Apple Team, since its inception, has always preferred to keep a strong grip on its hardware and software to ensure efficiency and security. Which is why if you’re venturing into breaking the hardware. Apple has made sure that it will not be an easy task for you.
The process is complex, requires a lot of attention to detail and a strong grip with your hands to make sure everything is carried out absolutely perfectly and no damages have to be seen. Please read all the steps very carefully and then remove battery from iPhone 6 and 6 Plus.
Coming to the step by step tutorial, we will guide you through this process, all backed by technical squads, so that you can successfully remove battery from iPhone 6 Plus or iPhone 6.
Required Tools to Remove Battery from iPhone 6
- 5-point security screwdriver.
- Standard #000 Phillips screwdriver.
- Spudger tool.
- Razor blade.
- iSesamo opening tool.
- Replacement battery for iPhone 6 or 6 Plus.
29 Steps to Remove Battery from iPhone 6 and 6 Plus
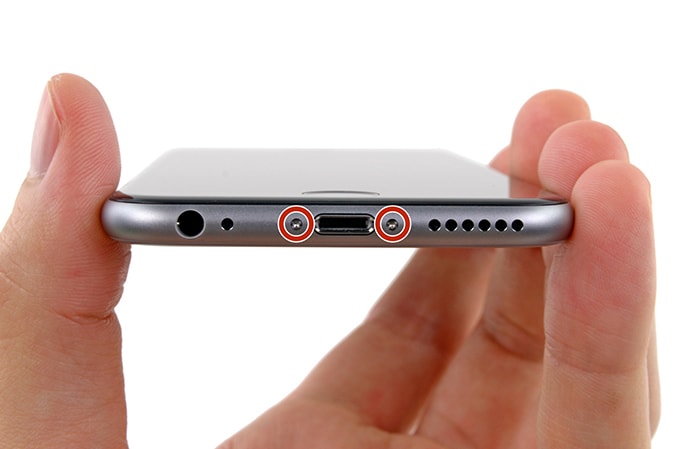
Step 1: The first task you have to carry out is to remove the two 3.6mm Pentalobe screws.
Step 2: Now use the iSclack and in the case that the plastic depth gauge is attached, make sure you remove it.
Step 3: I recall my heart pounding at this step, but it’s actually quite safe – close the handle on the iSclack, opening the suction cup jaws and attach it to the screen of the iPhone 6/6 Plus.

Step 4: You must position the iSeasamo’s upper suction cup onto the display, just above the home button. Open the handle to close the jaws of the iSclack.

Step 5: Hold your iPhone securely.
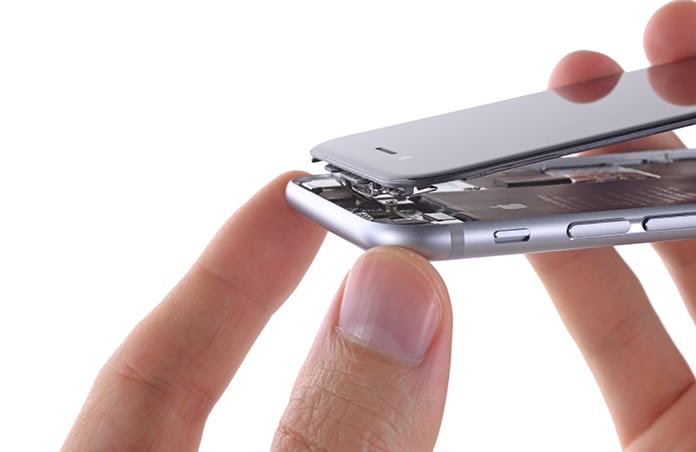
Step 6: Carefully close the handle of the iSclack as you detach the front panel up from the rear.

Step 7: You can now peel the two suction cups away from your iPhone.
Step 8: Open the iPhone by swinging the home button end of the front panel assembly away from the end section with caution and care.
Step 9: Now slide the front panel upwards until its top edge.
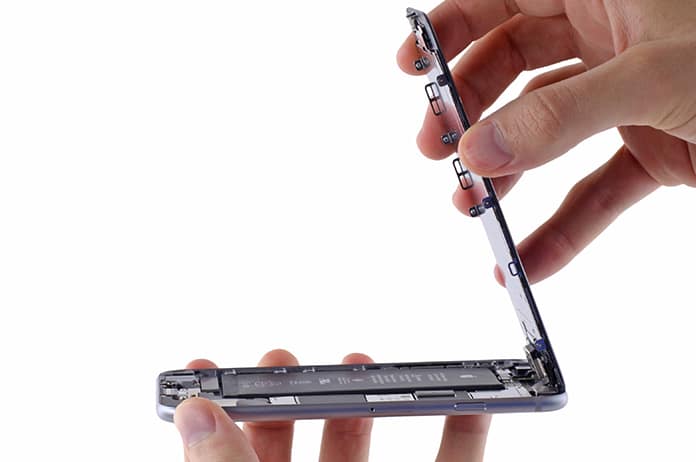
Step 10: Open the display at a 90º angle and add a rubber band to keep the display securely positioned the way it should be.
Step 11: Remove the Phillips screws from the battery connector.
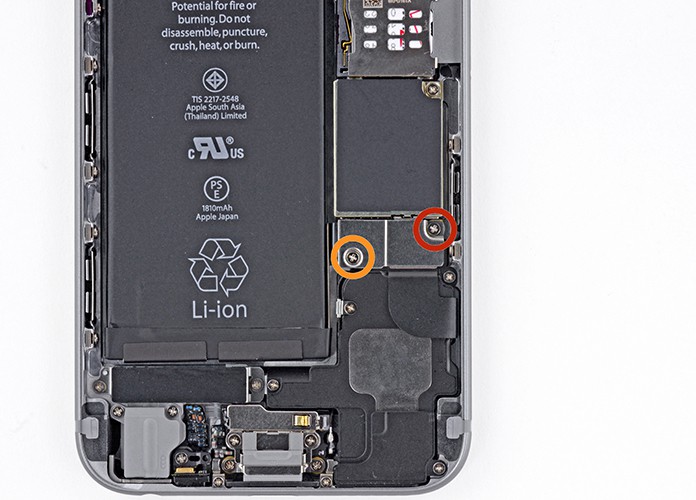
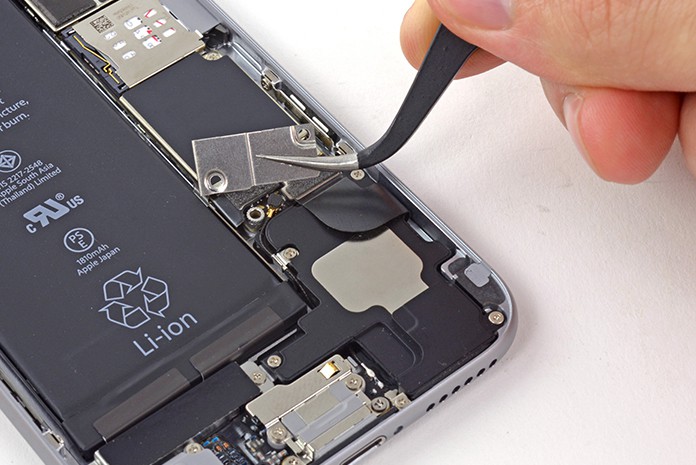
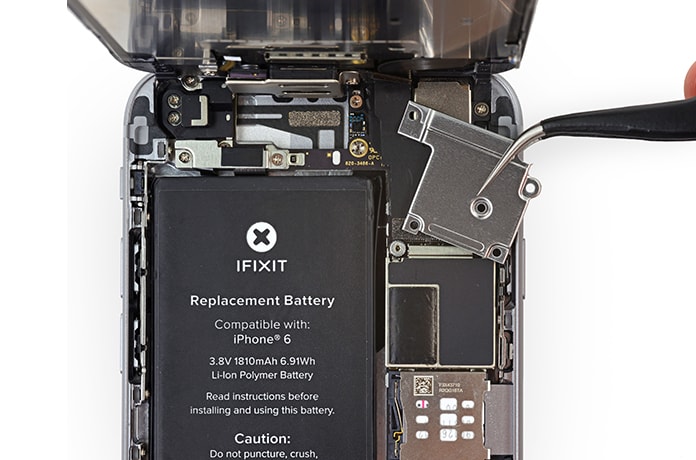
Step 12: You must now remove the metal battery connector bracket from within the iPhone.
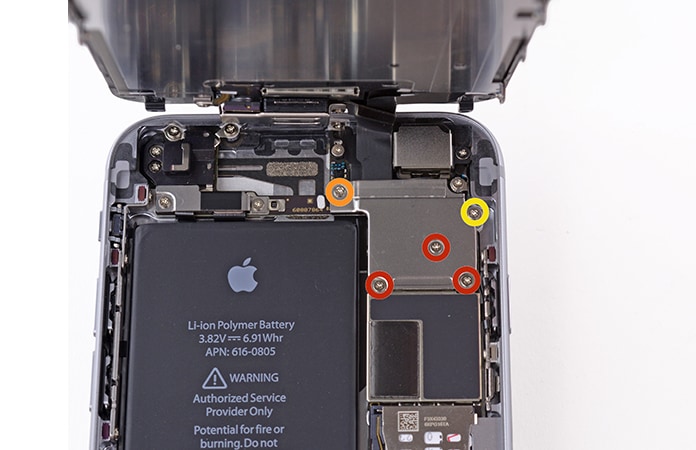
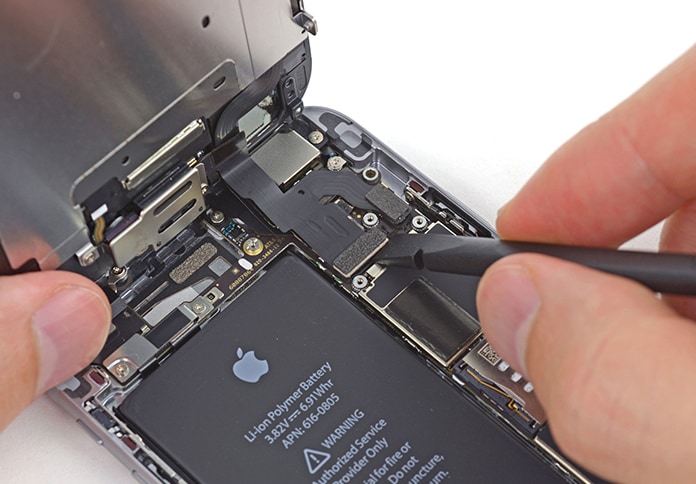
Step 13: There are specific screws which you must now direct your attention to. Remove the five screws securing the front panel assembly cable bracket.
Step 14: Carefully take away the front panel assembly cable group from your logic broad.
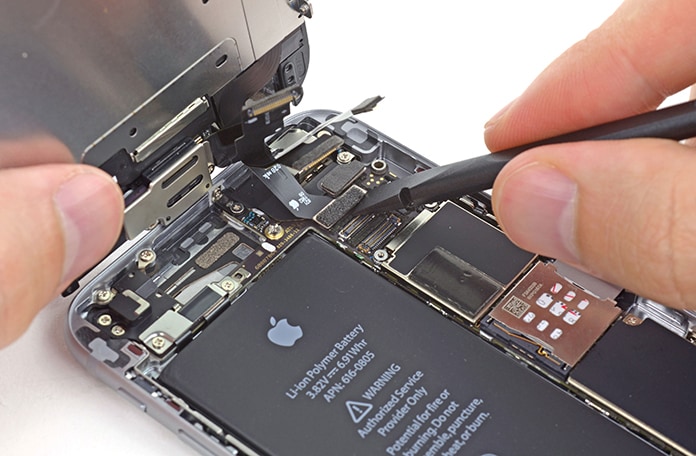
Step 15: Use the flat end of the spudger to remove the leading face camera and sensor cable connector.
Step 16: Work with the level end of the spudger to remove the house button cable connection.
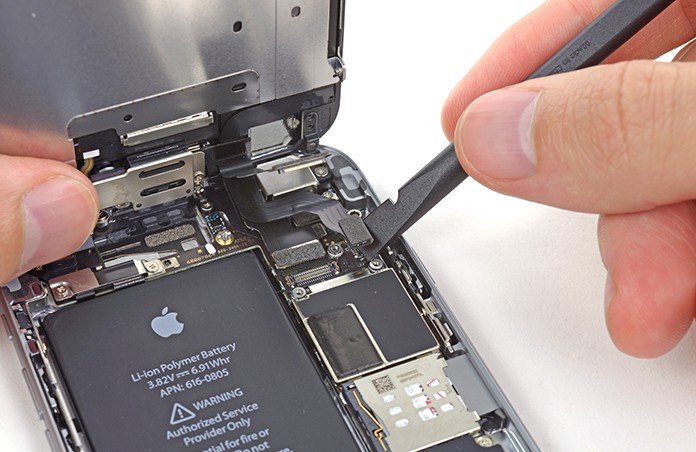
Step 17: Use the flat end of the spudger to remove the display data cable connector.
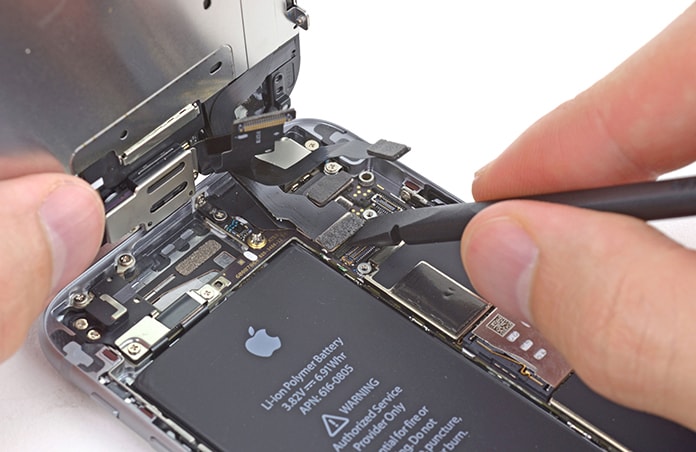
Step 18: Utilize the level end of the spudger to remove the digitizer cable connector.
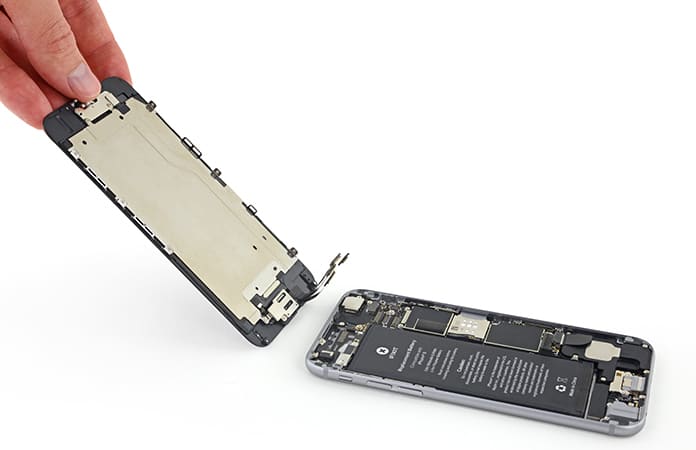
Step 19: Remove the front panel assembly from your rear case.
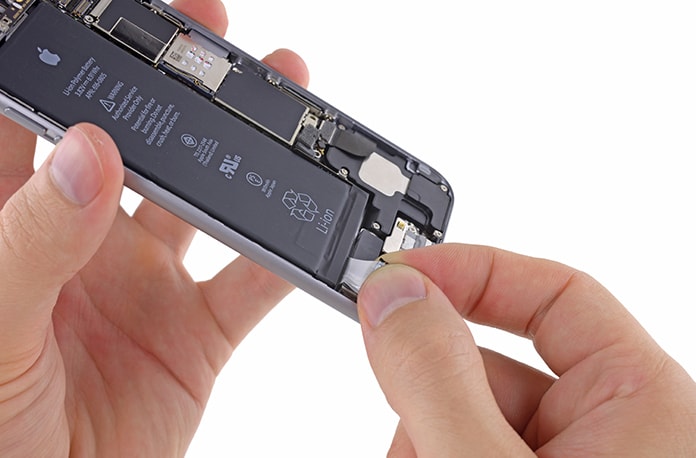
Step 20: Peel back the primary battery glue tab from the bottom right fringe of the battery.
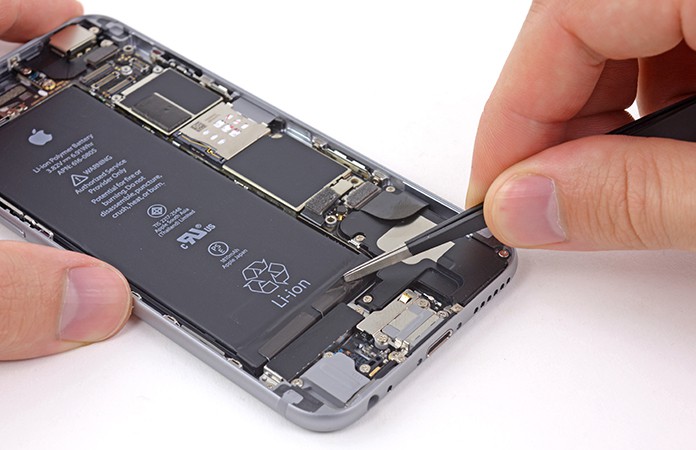
Step 21: Gently pull the battery glue tab away from the battery and then towards the bottom.
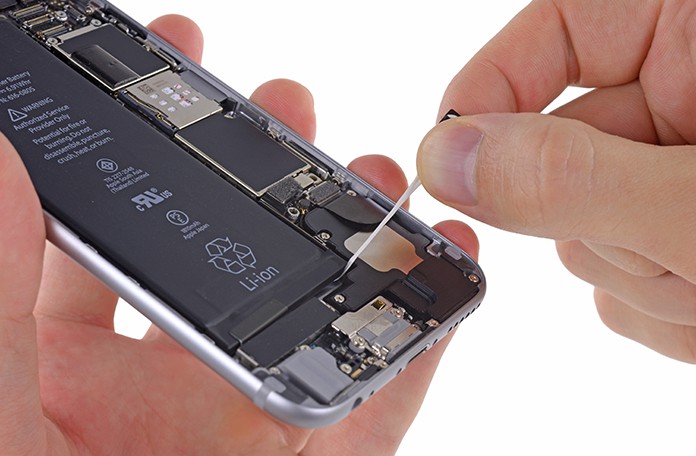
Step 22: Continue with the above step, enabling the strip to slowly fall out from involving the battery and the rear case. Whenever you experience enhanced opposition in the strip, stop pulling and continue with the next step.
Step 23: Once you feel the weight from the adhesive strip, pull it lightly across the lower right place of the battery.
Step 24: Continue to pull the adhesive tab upward and away from the right edge of the battery. Letting it gradually slide-out from between the battery along with the rear case. Until the strip completely detaches itself from the iPhone.
Step 25: Peel back the next battery glue tab in the bottom left fringe of the battery.
Step 26: Gently pull the battery adhesive tab upward and away from the battery. Allowing the adhesive strip to slowly slide out from the battery and the rear case.
Step 27: Do not stop taking the sticky case and as soon as you feel enhanced resistance, come to a stop.
Step 28: If you feel increased opposition in the adhesive strip, maneuver gently around the lower left part of the battery.
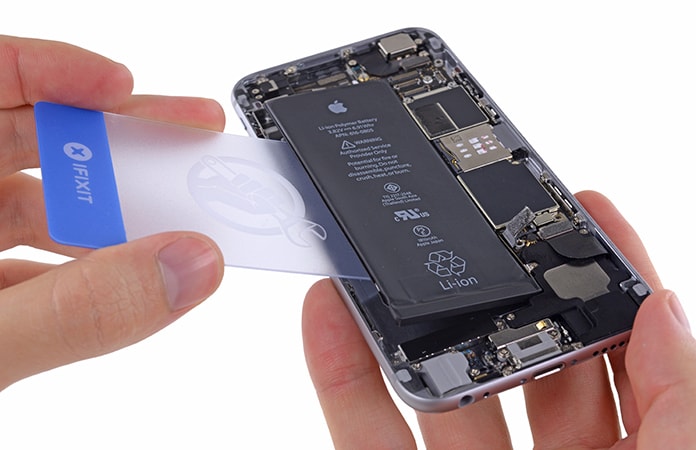
Step 29: You must now switch the iPhone on its back and place a plastic card involving the case area of the battery as well as the rear case.
Video Guide on How to Remove iPhone 6 Battery
Read Also: How to Calibrate iPhone Battery
You have now successfully removed battery from iPhone and we hope that it served you well!


