Dear readers, it’s finally here, what we all had been waiting for. The jailbreak for iOS 6.1 / 6.0.1 / 6.0.2 and iOS 6.0 has been released. We’re going to write the jailbreak guide for Mac OS X, and before you follow it, make sure your device is updated to the latest iOS version.
Please note that the evasi0n jailbreak tool doesn’t work on Apple TV. You should also backup important data in case anything goes wrong.
Evasi0n Jailbreak iOS 6.1 Untethered [Video Guide from iDB]
Steps to jailbreak IOS 6.1 with Evasi0n [Guide]
Step 1: Download evasion for Mac OS X from our download section.
Step 2: Launch the app by double clicking it.
Step 3: Unlock your device by going to Settings > General > Passcode Lock and choose Turn Passcode Off. This is for device users who have a passcode set.
Step 4: Connect the device to the computer. Make sure it’s running iOS 6.0 and above, and the device is not an Apple TV.
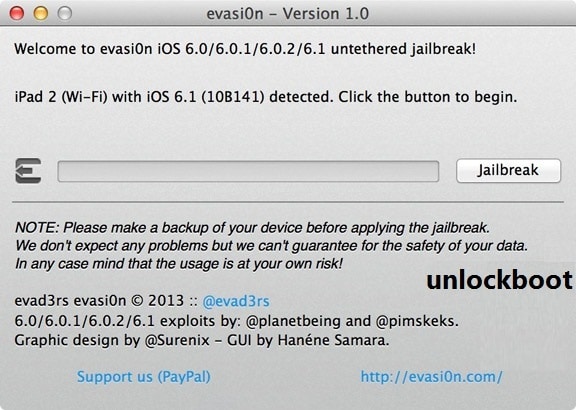
Step 5: A message would appear stating the evasi0n jailbreak tool has detected the device, after which, the ‘jailbreak’ button will become active. Click on this button to begin the process.
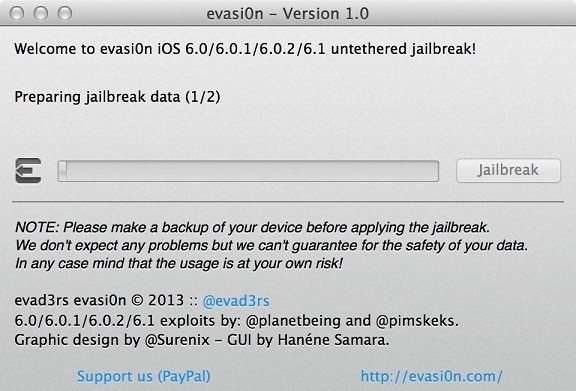
Step 6: Wait when processes are performed automatically. This includes making the data for jailbreak, implementing it, restart of the device and uploading of Cydia along with its packages. Just give it a while.
Step 7: After the completion of all the previous steps, a screen will ask you to unlock the device. After doing so, there’s a new app on the screen labeled as jailbreak. MAKE SURE YOU PRESS THIS ICON ONLY ONCE, and after you do, the screen will go blank and return to Springboard.
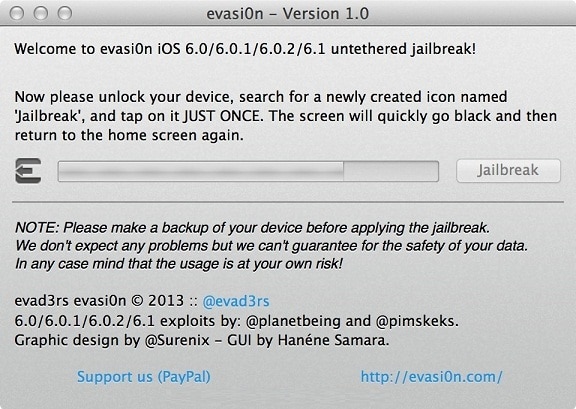
![]()
Step 8: More messages will appear such as Root Filesystem and jailbreak injection messages.
Step 9: A ‘Done’ message on the tool will appear at the end, and the device is going to reboot. The device may reboot several times, which is normal.
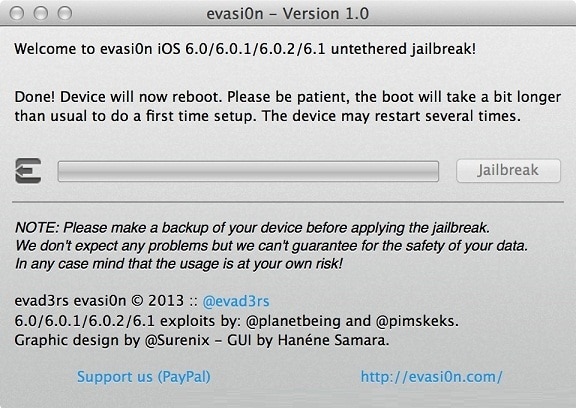
Step 10: A huge evasi0n logo with a white background will appear on the homescreen. Some messages will appear, which are as follows:
- Setting up fstab and AFC2
- Setting up Cydia
- Setting up Cydia packages
- Clearing SpringBoard Cache
- Rebooting
You may miss these messages as they go quickly, and after the device reboots the final time, more messages will appear on a white screen:
- Initializing offsets
- Finding offsets
- Patching kernel
- Cleaning up!
- Done! Continuing boot
After all of this, your device will take you to the Springboard, which means the jailbreak process is done.
The last step required is for unlocking the device, and to do so, make left swipe (once or twice), and launch Cydia. Let it initiate. You’ll be redirected to the lock screen a final time, after which, you can launch Cydia and define user type.
That’s it, your iDevice has finally been jailbroken. Feel free to leave comments.
