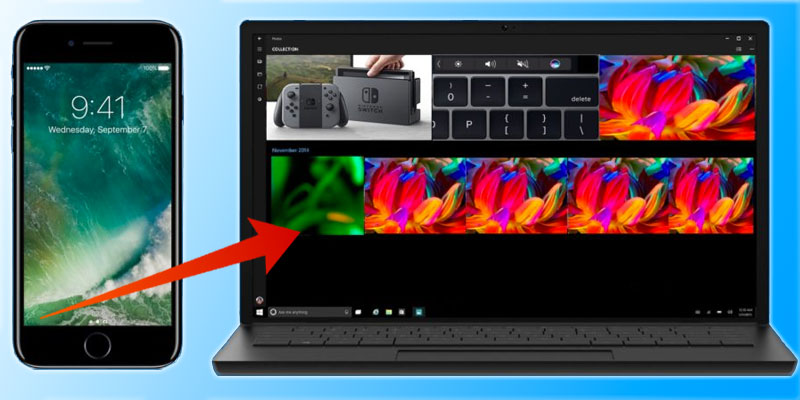
Do you want to know how to transfer photos from iPhone to PC running Windows 10? Not every iPhone owner has a full-fledged Apple setup. A lot of first time Apple users start with the iPhone and later on adapt to the other Apple ecosystems like the Macintosh computers, iPads, iPods etc. Windows PC and iPhone user – this happens to be a very common combination.
Since iOS ecosystem is more restricted and protected, a new user from scratch or transferee from Android might find transferring photos from an iPhone to a PC running Windows 10 very difficult. We have explained the methods below to easily transfer photos from iPhone to PC.
Install iTunes on your PC to Transfer Photos from iPhone or iPad
You can transfer the photos without having iTunes on your computer, however, we would recommend you still install iTunes on your Windows 10 PC.
The first and foremost step for an iPhone owner who has a Windows 10 PC is to install iTunes on their computer. iTunes is an Apple proprietary software and it is available on the Apple website for free. Head over to www.apple.com/itunes and download the iTunes software. After the download completes, double click on the executable installer file.

Install iTunes to import photos from iPhone to Windows 10
Windows would prompt for verification of an internet file installation, allow the installation. Once the installation is complete, open iTunes and sign in with your iTunes credentials. This is required to make an iPhone trusted with a specific iTunes software installed on a specific PC. Up to 5 computers could be marked trusted.
Now when the iTunes installation is completed and all set, you might proceed to the next available step.
1. iPhone to Windows PC Photo Transfer using iTunes Sync
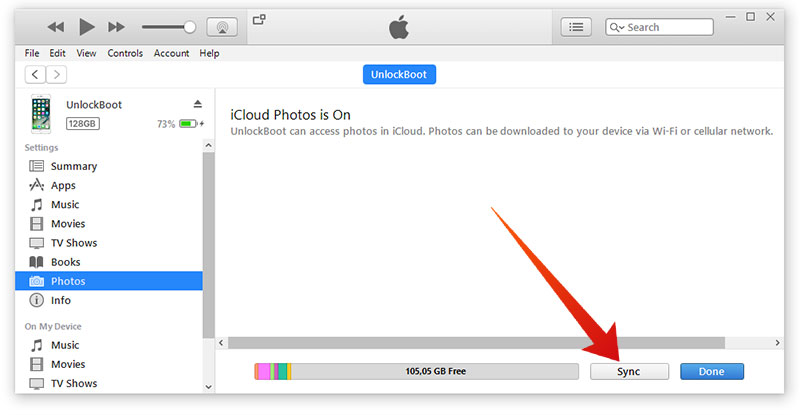
Use iTunes to transfer photos from iPhone to PC
- Grab the lightning cable that came with your iPhone. Using the official cable is recommended because this cable would offer the fastest available transfer bandwidth.
- Connect the iPhone to your computer. Open iTunes and your iPhone should be detected by iTunes.
- From the left pane of iTunes where your iPhone should be showing right now, click on ‘Photos’.
- Check the box ‘Sync Photos’ and find the Sync button in the bottom. Click on it, allow iTunes to complete the process.
- After a while, all your photos would be synced the iTunes library in your PC.
2. Transfer Photos from iPhone to Windows 10 PC Using Photos App
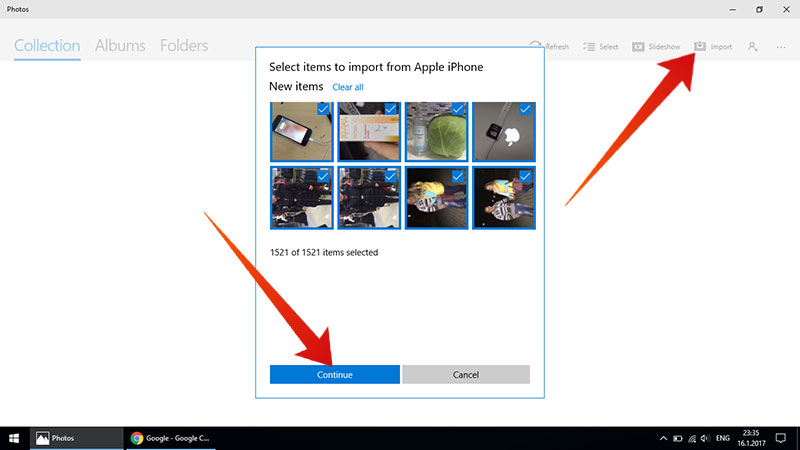
Transfer Photos from iPhone to PC using Photos App
Windows 10 comes with an excellent photo management tool, the default ‘Photos’ app. You could simply use this program to download iPhone photos to Windows 10 and save yourself further troubles.
- With your iPhone connected to your PC, open the Photos app.
- Click on the Import icon on the top right corner, the icon is identified by a downward facing arrow.
- Photos app would fetch the photos on your iPhone. Select the ones you want to save to your PC.
- After selection, click on ‘Continue’. The process should begin.
3. Transfer Photos from iPhone to PC Using Windows Explorer
- Connect the iPhone to your PC.
- The iPhone would be detected as a standard camera with an internal storage. Navigate to that drive using Windows Explorer.
- Click on ‘Internal Storage’, then find the folder DCIM.
- Select the photos within the folder, and copy – paste (or drag and drop) to your preferred directory.

Manually transfer photos from iPhone to Computer running Windows 10
This is the easiest way to transfer photos from your iPhone to Windows 10/8/7 or XP. If the device is not shown in My Computer, you will need to install the drivers or tap Trust on your iPhone to connect it.
4. Transfer Photos from iCloud to Windows PC

Transfer photos from iCloud to PC
You can easily download your photos from iCloud directly on your Windows computer. To do that, follow the steps below:
- Open your web browser and go to icloud.com
- Enter your iCloud ID to log in.
- Now navigate to “Photos” from the menu.
- Select the photo you want to download on your PC.
- Now from the upper right corner click on the download icon. The photo will be downloaded on your PC in the default download location.
If you want to download multiple photos at once, you can select them by holding the Shift key on the keyboard and select the photos you want to download.
Conclusion: Transferring photos from an iPhone to Windows 10 isn’t very difficult, but might take a while to get used to. You should have a grip on the process by now.


