Having a smartphone in one’s palmtop is blessing in the sense that someone can maintain most of their personal and business contacts through the smartphone without actually turning on a computer. Smartphones have already become most people’s primary communicator in 2017, allowing them for higher levels of productivity. With all these benefits and features available, it’s kind of frustrating when a simple task like deleting or moving mails between folders on the iOS operating system is simply denied by the error message ‘unable to move messages’.
It’s annoying, but it’s common. If you are getting the message very often and looking for a way to resolve the issue, keep reading through.
Why the ‘Unable to Move Message’ Error Appears on iPhone or iPad
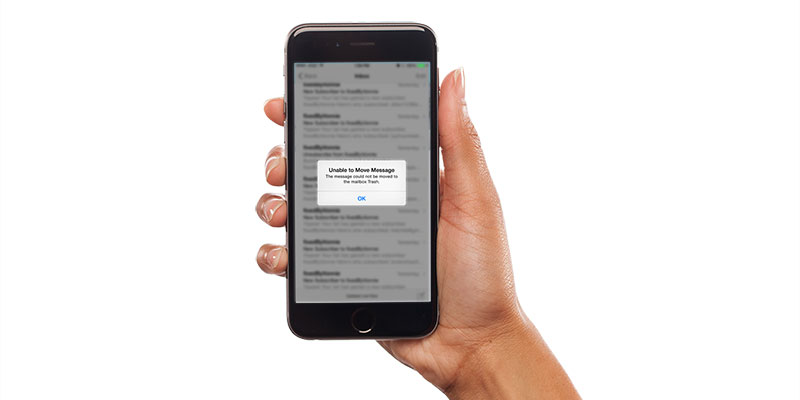
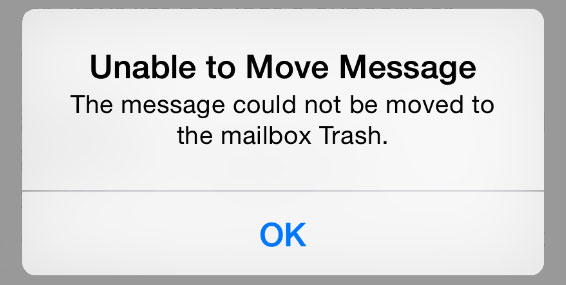
Users of iOS platform might encounter the error message ‘unable to move message’ while trying a delete or move operation in their inbox. When this message shows up, selected emails can’t be moved to the Trash. Since the mails can’t be removed or transferred to other mailboxes, they re-appear in the primary mailbox.
However, this problem is more apparent when multiple accounts are set up in the Mail app in iOS. Also, not all the accounts suffer from this issue but only one or two out of many. According to many reliable sources, the problem is caused by improper IMAP or POP settings.
How to Solve the ‘Unable to Move Message’ Issue
To resolve the ‘Unable to Move Message. The message could not be moved to the mailbox Trash’ issue on iOS, the following steps could be taken:
- Toggle Mail On and Off: Since the problem happens only to one or two mail account out of the many that are added in Mail, toggling the account on and off could be effective. To do so, open Mail and select the account that’s causing trouble. Toggle the account off, close Settings and reboot your phone. After the iPhone turns back on, go to Settings again, toggle Mail on and check if the issue’s been fixed.
- Remove and Re-Add Mail Account: Start from scratch with the problematic email account. To do so, go to the Mail Settings and find the account that’s creating issues. Tap on it, then ‘Delete Account’. Your problematic mail account should now be deleted after a while. To re-add the mail account you have just deleted, go to Settings -> Mail & Accounts then tap on Add Account.
- Try Deleting a Trash Folder: Open the Mail app and navigate to the section that lists all the connected accounts. Use the expand icon to see all the folders under each connected account. There should be folders like Inbox, Drafts, Sent, and Trash etc. Check for an account with more than one Trash folder, if there’s one then check both Trash folders for ‘Error’ folder inside them. Delete the Error folder, close Mail app and check whether the issue has been resolved. If not, try deleting other Trash folders under the same account.
Conclusion: These are some easy trial and error methods to resolve the issue. If nothing works, try deleting everything from Mail and start setting up from the scratch.


