When iPhone owners try to update or restore their device, they usually stumble across different errors. If there is an error, there is no continuation of restoration or update, until the error is removed. One such issue is the error 2009. If you’ve been facing this error, you’re in the right place. This post talks about 5 tips you can implement to fix iTunes error 2009 and remove this bug completely to continue with what you’re doing.

5 Tips to Fix iPhone Error 2009 in iTunes
Here are 5 tips to try if you got error 2009 while restoring your iPhone via iTunes:
Tip 1: Check iTunes to see if there is any update available. If there is, you should go ahead and download it and then install it.
Tip 2: Restart your PC. Most of the errors may surprisingly be no longer there after the computer has been restarted. Once it is switched back on, launch iTunes, and restore or start the update again.
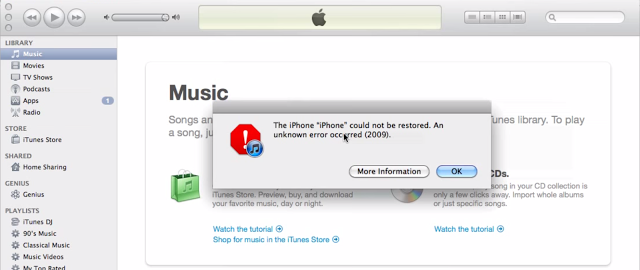
iTunes Error 2009 Message on PC
Tip 3: Ensure that your antivirus is updated. This can be quite significant. Check to see if your security software has any update available. If there are, install and download them, and then try to update or restore your iDevice.
Tip 4: The next thing you should try is restoring iTunes. This is because in many instances, the issue could be with iTunes, and therefore, the update be not be the answer to the problem. Uninstall iTunes first, and then download it again, and then install it.
Tip 5: Deactivate iTunes helper. For doing this on Mac, head over to System preferences -> Accounts and then select Login items. When you view iTunes Helper, deactivate it. For doing this on Windows, head over to Start -> Run and then type msconfig, and then hit enter on the keyboard. Search for iTunes helper and deactivate it.
After a while, iTunes will reactivate the process, but this isn’t important. You only require it until the update or restoration process is done.
Extra tip to fix iTunes error 2009: Try to restore your iPhone or iPad using another Computer. Use your friend’s Computer to restore the device. You need to follow the same steps:
- Connect your iPhone to the PC or Mac.
- Open iTunes and click on the Restore button.
- Restore your device.
- Now you need to activate your iPhone.
The iTunes error 2009 now should be resolved and the restoring or updating process should be completed.
We hope that these 5 tips are going to help you to fix error 2009 on your device. If it doesn’t, you should visit an Apple Store or get in touch with customer support.


